Table des matières
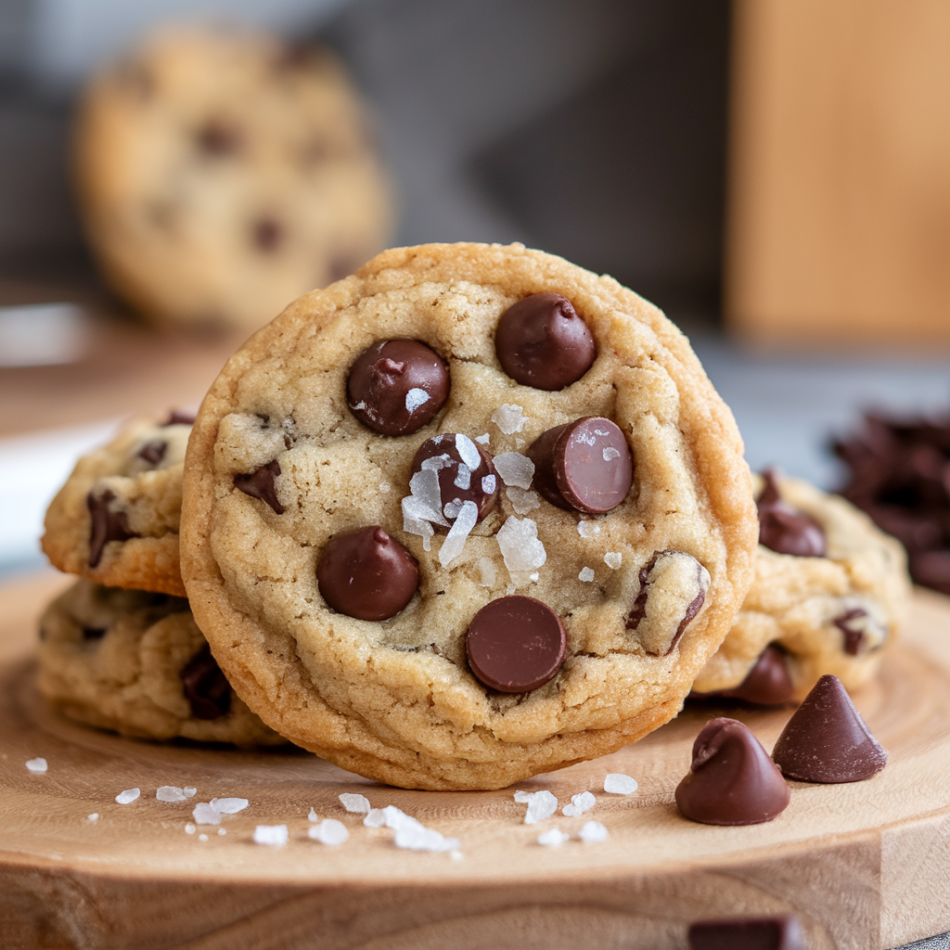
There’s something undeniably comforting about a warm, gooey chocolate chip cookie straight from the oven. The golden, crispy edges, the soft, melt-in-your-mouth center, and those bursts of rich chocolate—pure bliss that takes you back to cozy afternoons, joyful gatherings, or simply a well-deserved moment of indulgence. But if you’re gluten-free, this iconic treat might feel off-limits. Not anymore. Say hello to the best Rorie’s gluten-free chocolate chip cookie, the ultimate way to enjoy cookies without sacrificing flavor, texture, or that irresistible homemade magic.
Ready to bake the best Rorie’s gluten-free chocolate chip cookie that will have everyone begging for more? In this guide, we’ll show you exactly how to create Best Gluten Free Chocolate Chip Cookies by Rorie in your kitchen. Discover the secret behind Rorie’s gluten-free flour blend, follow our easy, step-by-step instructions, and pick up pro tips that will always guarantee success. Plus, we’ll share ways to customize your cookies, answer all your FAQs, and even highlight the benefits of gluten-free baking. Sound good? Let’s grab those mixing bowls and turn your cookie dreams into reality—one sweet bite at a time!
If you’re searching for more cookie recipes, this list is sure to catch your interest!
Chocolate Chip Marshmallow Cookies Recipe: The Ultimate Sweet Delight
Gluten Free Chocolate Chip Cookie
Why You’ll Love This best Rorie’s gluten-free chocolate chip cookie
- Gluten-Free Perfection: Whether you’re gluten-intolerant or just exploring new baking adventures, this recipe delivers the best Rorie’s gluten-free chocolate chip cookie so suitable you won’t miss the gluten.
- Incredible Texture: Crispy on the outside, soft and chewy inside—just like the classic cookies you grew up loving.
- Rich Chocolate Flavor: Packed with gooey chocolate chips in every bite, these cookies are a chocolate lover’s dream.
- Easy to Make: With simple ingredients and clear instructions, this recipe is beginner-friendly yet impressive enough for seasoned bakers.
- Customizable: Want to add nuts, swap chocolate chips for white chocolate, or experiment with flavors? This recipe is your perfect canvas for creativity.
- Kid and Crowd Approved: Everyone, from kids to adults, will rave about these cookies. They’re perfect for sharing—or not!
- Healthier Choice: Made with Rorie’s gluten-free flour blend, these cookies are a treat you can feel good about indulging in.
Ingredients for Best Gluten Free Chocolate Chip Cookies by Rorie
Now that we have the flour blend ready, let’s gather the rest of the ingredients:
- 2 ½ cups Rorie’s gluten-free flour blend
- 1 teaspoon baking soda
- ½ teaspoon salt
- 1 cup unsalted butter, softened
- 1 cup granulated sugar
- ½ cup packed brown sugar
- 2 large eggs, at room temperature
- 2 teaspoons pure vanilla extract
- 2 cups semi-sweet chocolate chips
How To Make the Best Gluten Free Chocolate Chip Cookies by Rorie
Step 1: Preheat the Oven
Set your oven to 350°F (175°C). Line two baking sheets with parchment paper or silicone baking mats to prevent sticking and promote even baking. This simple step ensures your cookies bake beautifully.
Step 2: Prepare the Dry Ingredients
In a medium bowl, whisk together the following
- 2 ½ cups of Rorie’s gluten-free flour blend
- 1 teaspoon baking soda
- ½ teaspoon salt
This step ensures the baking soda and salt are evenly distributed throughout the flour, so your cookies bake up perfectly.

Step 3: Cream the Butter and Sugars

In a large mixing bowl, combine:
- 1 cup softened unsalted butter
- 1 cup granulated sugar
- ½ cup packed brown sugar
Using an electric mixer, beat the mixture on medium speed for 2–3 minutes until it becomes light and fluffy. This process aerates the mixture, which helps your cookies rise and gives them a soft, tender texture.
Step 4: Add Eggs and Vanilla

To the butter-sugar mixture, add:
- 2 large eggs, one at a time
- 2 teaspoons pure vanilla extract
Beat well after each addition. The result should be a creamy, smooth mixture where the eggs are fully incorporated.
Step 5: Combine Wet and Dry Ingredients

Slowly incorporate the dry ingredients into the wet mixture, stirring on a low setting until just combined. Scrape down the sides of the bowl as needed. Avoid overmixing the dough to prevent your cookies from becoming tough.
Step 6: Fold in the Chocolate Magic
Grab a spatula or wooden spoon and gently fold in 2 cups of semi-sweet chocolate chips. Take your time to distribute the chocolate evenly throughout the dough, ensuring that every bite is a delightful explosion of chocolatey goodness.
Step 7: Chill the Dough (Optional but Recommended)
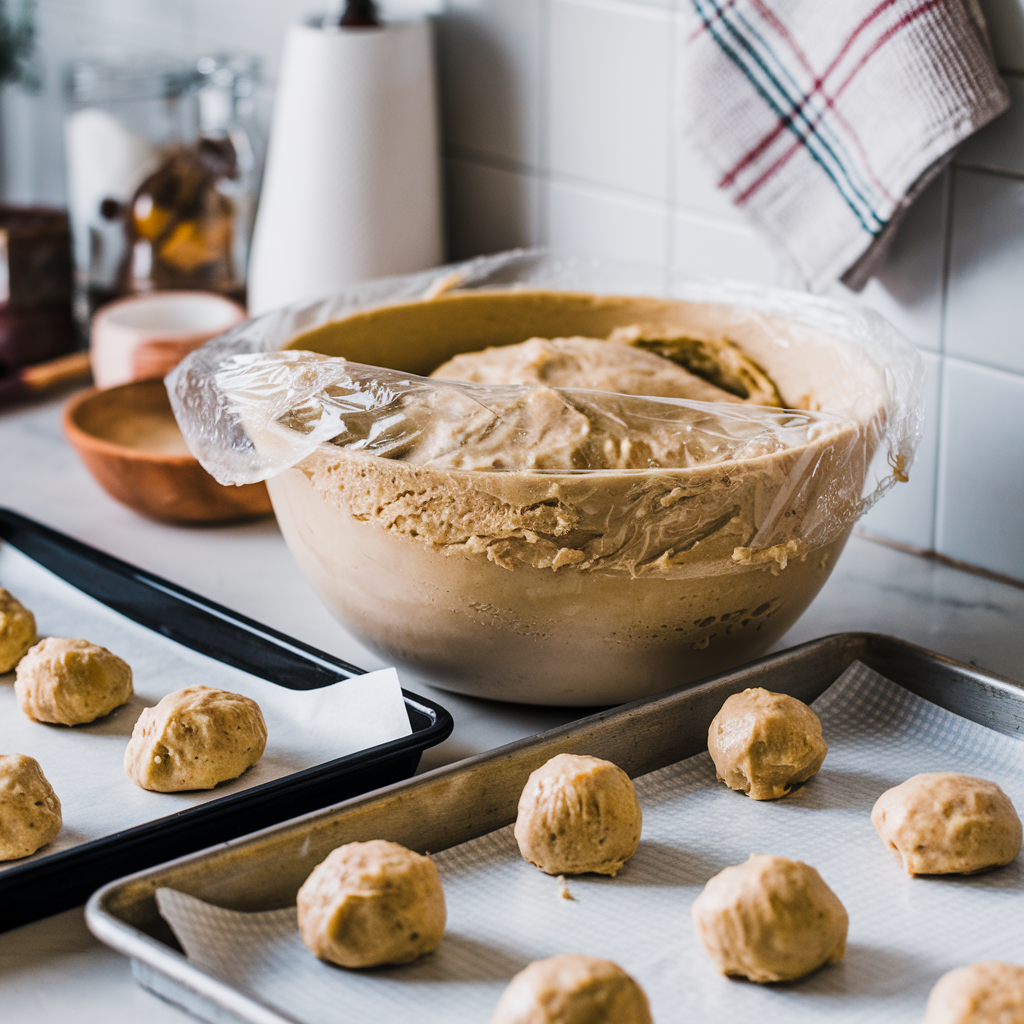
Wrap your dough in plastic and let it rest in the fridge for at least 30 minutes. Chilling is your secret weapon—it solidifies the fats, minimizes spreading during baking, and allows the flavors to meld into something spectacular.
Step 8: Scoop the Dough
Use a cookie scoop or tablespoon to shape the dough into smooth, rounded balls. Place them on the prepared baking sheets, leaving about 2 inches of space between each cookie to allow room for spreading.
Step 9: Bake
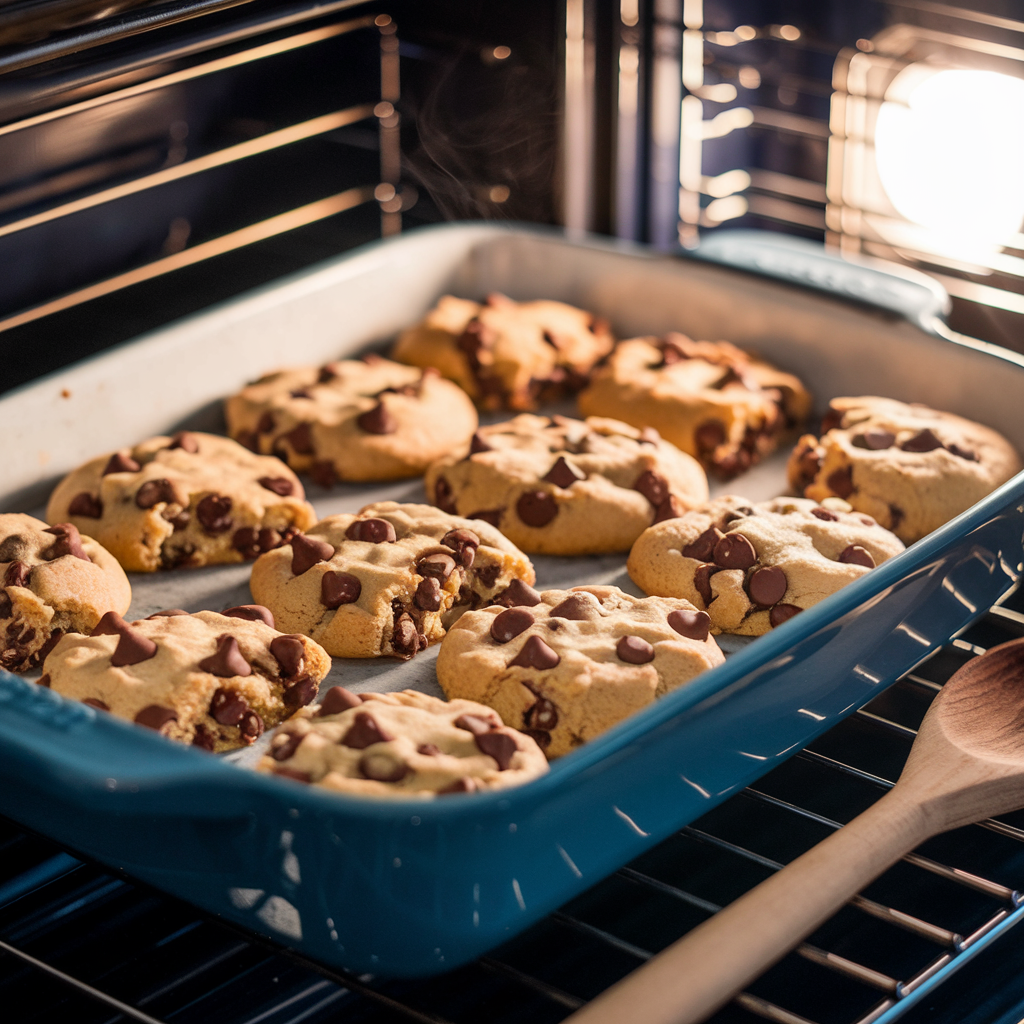
Bake in the preheated oven for 10–12 minutes, or until the edges are golden brown and the centers look just set. If you prefer softer cookies, remove them from the oven slightly earlier for that gooey cente
Step 10: Cool and Enjoy
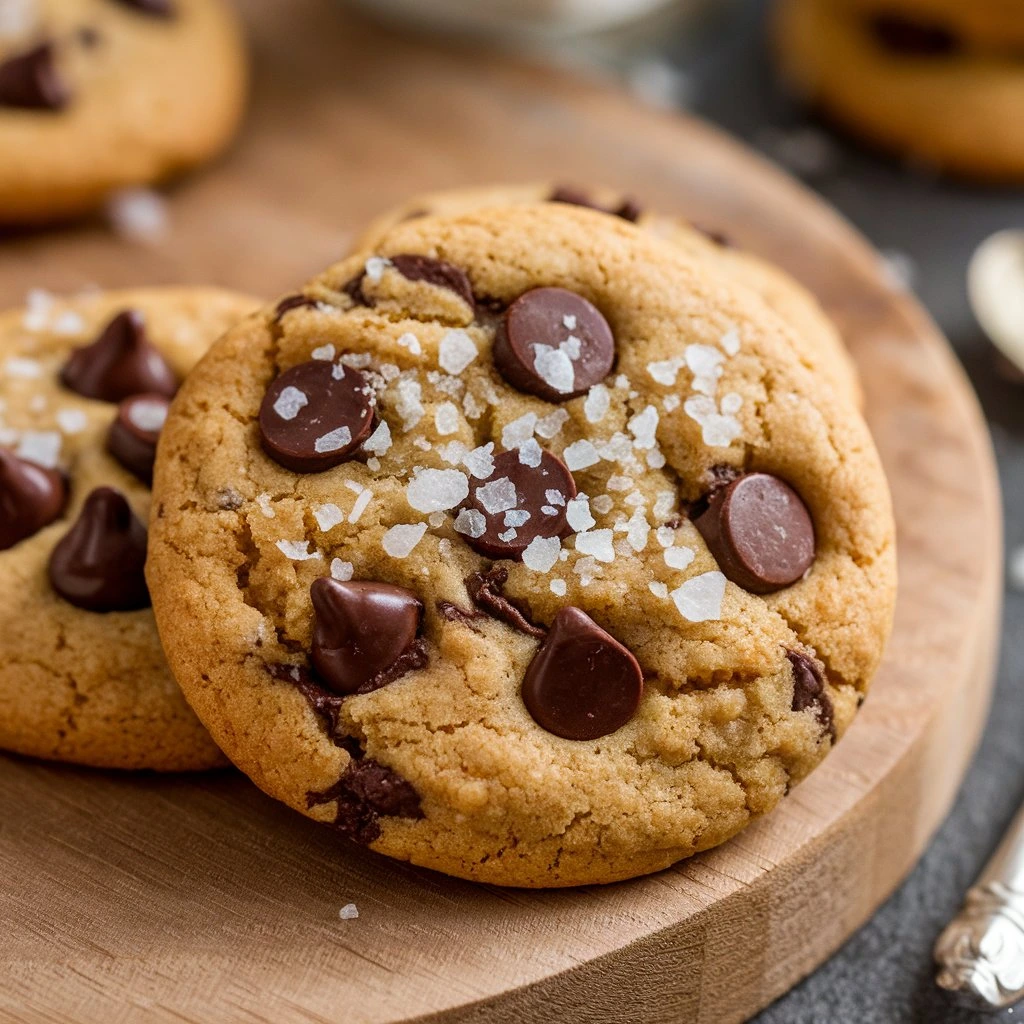
After removing the cookies from the oven, let them sit on the baking sheet for five minutes. Then, transfer each cookie to a wire rack to cool down fully, ensuring they set perfectly.
Expert Tips for Best Gluten Free Chocolate Chip Cookies by Rorie
- Start with Room Temperature Ingredients : Using room-temperature butter and eggs is a game-changer. It allows the ingredients to blend effortlessly, creating a smooth, well-mixed dough. If your butter or eggs are too cold, they can make the dough clumpy, leading to uneven cookies. In a hurry? Soften butter by cutting it into small cubes, or warm your eggs by placing them in a bowl of warm water for a few minutes.
- Don’t Forget the Xanthan Gum : This tiny but mighty ingredient is essential in gluten-free baking. It mimics gluten’s binding and elasticity properties, ensuring your cookies stay together and have that perfect chewy texture. Without it, your cookies might fall apart or feel crumbly.
- Measure Like a Pro : Accuracy is everything when baking, especially with gluten-free recipes. Too much or too little of an ingredient can drastically alter the outcome. Use proper measuring tools or invest in a kitchen scale for precision. It’s a small step that makes a big difference in how your cookies turn out.
- Mix Gently : Be careful not to overmix your dough. Overworking it can add too much air, making your cookies puff up and then collapse or become dense. Mix until the ingredients are combined, then gently fold your chocolate chips or other add-ins.
- Bake a Test Cookie First : Gluten-free cookie dough can behave unpredictably, so testing the waters with one cookie is a good idea. If it spreads too much, try chilling the dough longer or adding more flour. Flatten the dough slightly before baking, or reduce the flour by a tablespoon if it’s too thick.
- Adjust for High Altitudes : The thinner air can affect your cookies if you live at a higher elevation. They might spread too much or bake unevenly. To fix this, add more flour (about 1–2 tablespoons) and reduce the baking soda slightly (about 1/4 teaspoon). You might also need to lower your oven temperature by 10–15 degrees and shave a minute or two off the bake time.
Variations
- Double Chocolate Delight: Replace half the gluten-free flour with cocoa powder for rich, chocolaty cookies. For a decadent twist, add white chocolate chips or chunks.
- Nutty Chocolate Chip: Mix in 1/2 cup of your favorite chopped nuts—pecans, walnuts, or almonds add a delightful crunch and flavor boost.
- Salted Caramel Bliss :Stir in caramel bits and sprinkle a pinch of flaky sea salt on top of each cookie before baking for a sweet and salty treat.
- Peanut Butter-Chocolate Heaven: Swirl 1/4 cup of peanut butter into the dough or mix in peanut butter chips for a nutty, chocolatey twist.
- Coconut-Lover’s Dream: Add 1/2 cup of shredded unsweetened coconut to the dough for a tropical flair. Pair with dark chocolate chips for an indulgent combination.
- Oatmeal Chocolate Chip: Stir 1/2 cup of certified gluten-free oats for added texture and a wholesome vibe.
- Mint Chocolate Chip: For a refreshing twist, replace half the chocolate chips with mint chocolate chips or add a teaspoon of peppermint extract to the dough.
Storing
At Room Temperature
After allowing the cookies to cool completely, place the Rorie’s gluten free chocolate chip cookie sin an airtight container at room temperature where they can be stored for up to seven days. To help retain their soft texture, add a slice of bread to the container.
Freezing Dough
- Scoop the Dough: After chilling, scoop the dough into balls.
- Freeze Individually: Place them on a baking sheet lined with parchment paper and freeze until solid.
- Store: Transfer the frozen dough balls to a zip-top freezer bag.
- Bake from Frozen: When ready to bake, place the frozen dough on a baking sheet and add 2-3 minutes to the baking time.
Freezing Baked Cookies
- Cool Completely: Ensure the cookies are fully cooled.
- Layer and Store: Place them in an airtight container, separating layers with parchment paper.
- Preserve the cookies by placing them in an airtight container and freezing for up to three months to ensure they remain fresh and delicious.
- Thaw: Bring to room temperature before serving.
Frequently Asked Questions
1: Can I use a different gluten-free flour blend for this recipe?
Yes, but results may vary depending on the brand. Rorie’s gluten-free flour blend is specifically formulated for this recipe, ensuring the perfect balance of texture and flavor. If you use a different blend, make sure it contains xanthan gum or add it separately.
2: What if my cookies spread too much?
This could happen if the butter was too soft or the dough wasn’t chilled long enough. Pop the dough in the fridge for 30 minutes to an hour before baking. If the problem persists, add 1–2 tablespoons of additional flour to the dough.
3: Can I make these cookies dairy-free?
Yes! Swap the butter for a dairy-free alternative (like vegan butter or coconut oil) and use dairy-free chocolate chips. the best Rorie’s gluten-free chocolate chip cookie will still turn out delicious!
4: Why do I need to use room-temperature ingredients?
Room-temperature ingredients blend more evenly, resulting in a smooth dough and better texture. Cold butter or eggs can cause uneven mixing and make the cookies less tender.
5: Can I make these cookies vegan?
Yes! Replace the butter with a plant-based alternative and the egg with a flax egg (1 tablespoon ground flaxseed mixed with 3 tablespoons water). Also, use dairy-free chocolate chips to keep them vegan.
6: Can I add mix-ins like nuts or dried fruit?
Definitely! Feel free to experiment with your favorite mix-ins, like chopped nuts, dried fruit, or candies. Just be careful not to overmix the dough when incorporating them.
7: What’s the best way to reheat these best Rorie’s gluten-free chocolate chip cookie ?
For a warm, fresh-from-the-oven taste, pop the cookies in the microwave for 10–15 seconds or heat them in a 300°F (150°C) oven for 2–3 minutes.
These FAQs should help you achieve the best the best Rorie’s gluten-free chocolate chip cookie .
9 Steps for the Best Gluten Free Chocolate Chip Cookies by Rorie
Ingrédients
- ½ cups Rorie’s gluten-free flour blend
- 1 teaspoon baking soda
- ½ teaspoon salt
- 1 cup unsalted butter, softened
- 1 cup granulated sugar
- ½ cup packed brown sugar
- 2 teaspoons pure vanilla extract
- 2 cups semi-sweet chocolate chips
Instructions
- Step 1: Preheat the OvenSet your oven to 350°F (175°C). Line two baking sheets with parchment paper or silicone baking mats to prevent sticking and promote even baking. This simple step ensures your cookies bake beautifully.
- Step 2: Prepare the Dry IngredientsIn a medium bowl, whisk together the following:This step ensures the baking soda and salt are evenly distributed throughout the flour, so your cookies bake up perfectly.2 ½ cups of Rorie’s gluten-free flour blend1 teaspoon baking soda½ teaspoon salt
- Step 3: Cream the Butter and SugarsIn a large mixing bowl, combine:Using an electric mixer, beat the mixture on medium speed for 2–3 minutes until it becomes light and fluffy. This process aerates the mixture, which helps your cookies rise and gives them a soft, tender texture.1 cup softened unsalted butter1 cup granulated sugar½ cup packed brown sugar
- Step 4: Add Eggs and VanillaTo the butter-sugar mixture, add:Beat well after each addition. The result should be a creamy, smooth mixture where the eggs are fully incorporated.2 large eggs, one at a time 2 teaspoons pure vanilla extract
- Step 5: Combine Wet and Dry IngredientsSlowly incorporate the dry ingredients into the wet mixture, stirring on a low setting until just combined. Scrape down the sides of the bowl as needed. Avoid overmixing the dough to prevent your cookies from becoming tough.
- Step 6: Fold in the Chocolate MagicGrab a spatula or wooden spoon and gently fold in 2 cups of semi-sweet chocolate chips. Take your time to distribute the chocolate evenly throughout the dough, ensuring that every bite is a delightful explosion of chocolatey goodness.
- Step 7: Chill the Dough (Optional but Recommended)Wrap your dough in plastic and let it rest in the fridge for at least 30 minutes. Chilling is your secret weapon—it solidifies the fats, minimizes spreading during baking, and allows the flavors to meld into something spectacular.
- Step 8: Scoop the DoughUse a cookie scoop or tablespoon to shape the dough into smooth, rounded balls. Place them on the prepared baking sheets, leaving about 2 inches of space between each cookie to allow room for spreading.
- Step 9: BakeBake in the preheated oven for 10–12 minutes, or until the edges are golden brown and the centers look just set. If you prefer softer cookies, remove them from the oven slightly earlier for that gooey cente
- Step 10: Cool and EnjoyAfter removing the cookies from the oven, let them sit on the baking sheet for five minutes. Then, transfer each cookie to a wire rack to cool down fully, ensuring they set perfectly.

