Table des matières
Treat yourself to a deliciously sweet experience with our Butterfinger Balls recipe! These little delights bring together the rich, crunchy taste of Butterfingers with a smooth, creamy coating, making each bite a perfect balance of flavors and textures. They’re a satisfying, bite-sized dessert that’s sure to please anyone with a sweet tooth and impress any crowd. Plus, they’re easy to make! Whether you’re an experienced baker or just starting out in the kitchen, this recipe is simple to follow and bound to become a go-to favorite in your dessert collection.
Why You’ll Love This Recipe
Creating butterfinger balls is not just about making a dessert; it’s about crafting an experience. Here’s why this recipe stands out:
- Simple Ingredients, Extraordinary Flavor: You don’t need exotic ingredients to make these delectable treats. With just a handful of pantry staples, you can whip up a batch of Butterfinger balls that taste like gourmet desserts.
- Quick and Easy Preparation : This butterfinger balls recipe is perfect for those who crave something sweet but don’t have hours to spend in the kitchen. From start to finish, it takes less time than you might expect.
- Versatile and Customizable : Whether you want to dip them in chocolate, roll them in nuts, or add a sprinkle of sea salt, Butterfinger balls offer endless customization options to suit your taste.
- Perfect for Any Occasion : From birthday parties to holiday gatherings, Butterfinger balls are a crowd-pleaser that will delight guests of all ages.

Ingredients
To create these scrumptious Butterfinger balls, you’ll need the following ingredients:
- 1 package of Butterfingers (about 36 pieces), chopped
- 8 ounces of cream cheese, softened
- 1/4 cup of unsalted butter, softened
- 1 teaspoon of vanilla extract
- 2 cups of powdered sugar
- 1 cup of chocolate chips
- Optional toppings: Sprinkles, crushed nuts, or sea salt
How to Make Butterfinger Balls
Follow these easy steps to whip up your batch of Butterfinger balls!
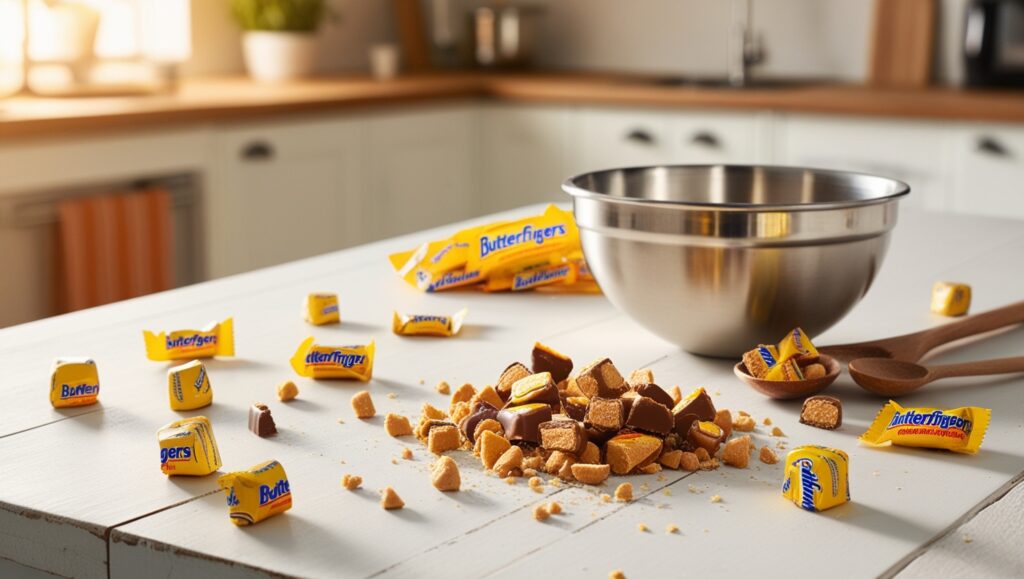
Step 1: Chop the Butterfingers
Start by chopping up the Butterfingers into small pieces, so each ball has the right mix of crunch and chew.
Step 2: Mix Cream Cheese and Butter
In a large bowl, combine softened cream cheese and unsalted butter. Beat until the mixture is smooth and creamy.
Step 3: Add Vanilla and Sugar
Incorporate the vanilla extract and powdered sugar into the bowl. Mix well until everything is combined, creating a smooth dough.
Step 4: Add the Butterfingers
Fold in the chopped Butterfinger pieces until they’re evenly spread throughout the dough.
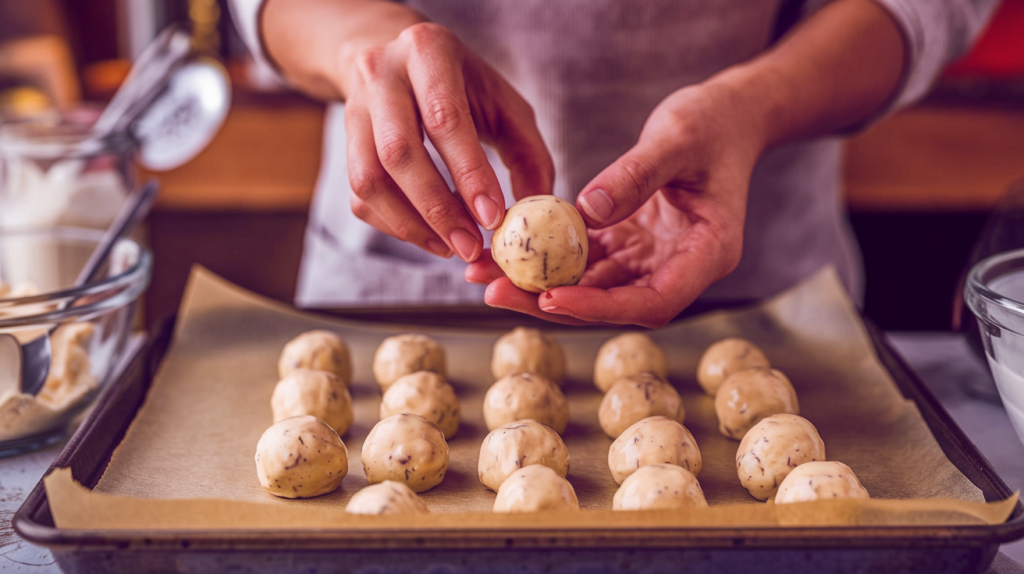
Step 5: Roll into Balls
Scoop a bit of the mixture and roll it into a ball about 1 inch in size. Lay each ball on a baking sheet prepared with parchment paper.
Step 6: Chill the Balls
Put the Butterfinger balls in the fridge for at least 30 minutes to firm up, so they’re easier to dip in chocolate.
Step 7: Melt the Chocolate
In a microwave-safe bowl, melt the chocolate chips in 30-second bursts, stirring in between until smooth.
Step 8: Dip the Balls in Chocolate
Using a fork, dip each chilled ball into the melted chocolate, making sure it’s fully coated. Let any extra chocolate drip off before placing them back on the parchment paper.
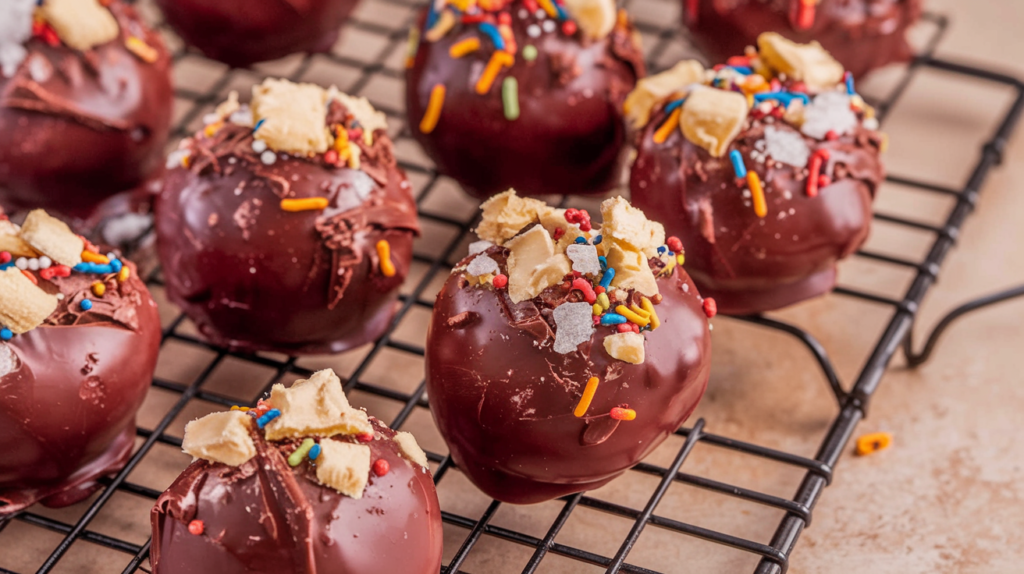
Step 9: Add Toppings
While the chocolate is still soft, sprinkle on your favorite toppings like sprinkles, crushed nuts, or a dash of sea salt for extra flavor.
Step 10: Let the Chocolate Set
Let the chocolate harden completely.

Step 11: Serve and Enjoy!
When the chocolate has fully set, your Butterfinger balls are good to go! Store any extras in a sealed container in the refrigerator.
Helpful Tips
To ensure your Butterfinger balls turn out perfectly every time, keep these tips in mind:
- Use High-Quality Butterfingers : The quality of your Butterfinger balls heavily depends on the Butterfingers you use. Opt for fresh, high-quality Butterfingers to enhance the overall flavor.
- Soften the Cream Cheese and Butter : Let the cream cheese and butter soften to room temperature before you start mixing. This ensures a smooth and consistent dough without lumps.
- Chill the Mixture Well : Chilling the butterfinger balls before dipping them in chocolate is crucial. It helps the chocolate adhere better and prevents the balls from becoming too soft.
- Customize Your Toppings : Don’t hesitate to add your own twist with unique toppings . From colorful sprinkles to a dusting of cocoa powder, the possibilities are endless and can make your Butterfinger balls uniquely yours.

Variations and Substitution Ideas to Enhance Your Butterfinger Balls
Take your Butterfinger Balls to the next level with these fun and creative variations and substitutions! These ideas will make your Butterfinger Balls even more enjoyable, perfect for adding a unique twist or accommodating different dietary needs.
- Peanut Butter Butterfinger Balls : Add Creamy Peanut Butter for Extra Richness
- Mix in 1/2 cup of creamy peanut butter with the cream cheese and butter mixture for a delicious nutty flavour. The peanut butter adds a rich, smooth taste that pairs perfectly with the crunchy Butterfinger pieces, giving each ball a deliciously satisfying texture and depth of flavour.
- White Chocolate Drizzled Butterfinger Balls : Add an Elegant White Chocolate Drizzle
- After coating the Butterfinger Balls in chocolate and allowing them to set, melt some white chocolate and drizzle it over the top for a classy touch. This white chocolate finish adds a touch of elegance and enhances the flavour with a subtle sweetness that contrasts beautifully with rich milk or dark chocolate.
- Vegan Butterfinger Balls : Make It Dairy-Free and Vegan-Friendly
- To make vegan Butterfinger Balls, swap out the cream cheese for a dairy-free alternative, like vegan cream cheese, and use vegan chocolate for coating. This way, the treats stay creamy and delicious while suitable for those following a plant-based diet. It’s a simple adjustment that doesn’t compromise on flavour or texture!
- Gluten-Free Butterfinger Balls : Ensure Gluten-Free Ingredients for Sensitivities
- If you want to make gluten-free Butterfinger Balls, choose gluten-free Butterfingers (or any gluten-free candy bar you prefer) and other certified gluten-free ingredients. This makes the recipe safe for those with gluten sensitivities while keeping it as delicious and crunchy as ever.
Each variation adds a unique twist to the classic Butterfinger Balls, allowing you to personalize the recipe to fit any preference or occasion. Whether adding a nutty richness, a touch of elegance or making them accessible for all dietary needs, these variations ensure everyone can enjoy this delightful treat!
For extended shelf life, place them in a freezer-safe container. They can be frozen for up to three months and thawed before serving.
Storage and Reheating Instructions for Butterfinger Balls
Follow these storage tips and tricks, whether you’re saving your Butterfinger Balls for a few days or months, to keep them as fresh and delicious as possible.
- Refrigerate : Best for Short-Term Storage
- Store your Butterfinger Balls in an airtight container in the refrigerator. This method keeps them fresh, firm, and flavorful for up to two weeks. Refrigeration also helps maintain the texture of the chocolate coating, ensuring that each bite remains satisfying and crunchy. Be sure to use a well-sealed container to prevent them from absorbing other flavors from the fridge.
- Freeze for Longer Storage : Perfect for Storing Up to Three Months
- If you’d like to keep the Butterfinger Balls for an extended period, place them in a freezer-safe container. Keep them frozen for up to three months, and when you want to enjoy them, thaw them overnight in the refrigerator. Freezing them preserves the texture and flavor so they taste as fresh as the day you made them. Be sure to separate layers with parchment paper to prevent them from sticking together in the freezer.
- Room Temperature : For a Quick Treat
- If you plan to enjoy Butterfinger Balls soon, they can be kept at room temperature for a day or two. While refrigeration is generally recommended to maintain the chocolate coating and prevent melting, keeping them out for a short period won’t affect their quality. Be mindful if it’s warm, as the chocolate may soften or melt.
- Reheat for Softened Chocolate : Enjoy with a Slightly Melted Chocolate Coating
- For an extra indulgent treat, slightly soften the chocolate coating by microwaving the Butterfinger Balls for 10-15 seconds before serving. This gentle reheating warms the chocolate, creating a somewhat gooey texture that pairs beautifully with the crunchy Butterfinger pieces.
By following these storage and reheating tips, your Butterfinger Balls will stay fresh, tasty, and ready to enjoy whenever you like!
Related Recipes
Enhance your culinary journey by exploring other delightful recipes on our blog:
Frequently Asked Questions (FAQs)
- Is it possible to substitute another type of candy bar for Butterfingers?
Absolutely! While Butterfingers provides a unique crunch, you can experiment with other candy bars like Snickers or Twix for a different flavor profile.
- How do I make the balls if I have nut allergies?
To make the Butterfinger balls safe for those with allergies, ensure you use Butterfingers that do not contain nuts or substitute with a nut-free candy bar alternative.
- Can I make these without cream cheese?
Cream cheese is essential for the creamy texture, but you can substitute it with mascarpone or a dairy-free cream cheese alternative if needed.
- How long do butterfinger balls last in the fridge?
When stored properly in an airtight container, butterfinger balls can last up to two weeks in the refrigerator.
- Is it possible to make these balls gluten-free?
Yes, by ensuring all your ingredients, especially the Butterfingers, are gluten-free, you can enjoy these treats without worry.

Conclusion
Our Butterfinger Balls recipe is a delightful fusion of crunchy, creamy, and chocolaty goodness that promises to become a staple in your dessert collection. Whether you’re preparing for a special occasion or simply craving something sweet, these butterfinger balls are sure to impress. We invite you to try this recipe and share your experience in the comments below. Your feedback and variations are always welcome!
Share the Sweetness!
Loved this Butterfinger balls recipe? Share it with your friends and family or leave a comment below to let us know how yours turned out. Don’t forget to explore more delicious recipes on our blog and subscribe for the latest updates!

4 Irresistible Reasons to try Butterfinger Balls
Equipment
- Large Mixing Bowl
- Spatula or wooden spoon
- Kitchen knife for chopping Butterfingers
- Baking Sheet
- Parchment Paper
- Microwave-safe bowl
Ingrédients
- 1 package of Butterfingers
- 8 ounces of cream cheese
- 1/4 cup of unsalted butter
- 1 teaspoon of vanilla extract
- 2 cups of powdered sugar
- Sprinkles, crushed nuts, or sea salt Optional toppings
Instructions
- Step 1: Chop the ButterfingersStart by chopping up the Butterfingers into small pieces, so each ball has the right mix of crunch and chew.
- Step 2: Mix Cream Cheese and ButterIn a large bowl, combine softened cream cheese and unsalted butter. Beat until the mixture is smooth and creamy
- Step 3: Add Vanilla and SugarIncorporate the vanilla extract and powdered sugar into the bowl. Mix well until everything is combined, creating a smooth dough.
- Step 4: Add the ButterfingersFold in the chopped Butterfinger pieces until they’re evenly spread throughout the dough.
- Step 5: Roll into BallsScoop a bit of the mixture and roll it into a ball about 1 inch in size. Lay each ball on a baking sheet prepared with parchment paper.
- Step 6: Chill the BallsPut the Butterfinger balls in the fridge for at least 30 minutes to firm up, so they’re easier to dip in chocolate.
- Step 7: Melt the ChocolateIn a microwave-safe bowl, melt the chocolate chips in 30-second bursts, stirring in between until smooth.
- Step 8: Dip the Balls in ChocolateUsing a fork, dip each chilled ball into the melted chocolate, making sure it’s fully coated. Let any extra chocolate drip off before placing them back on the parchment paper.
- Step 9: Add ToppingsWhile the chocolate is still soft, sprinkle on your favorite toppings like sprinkles, crushed nuts, or a dash of sea salt for extra flavor.
- Step 10: Let the Chocolate SetLet the chocolate harden completely.When the chocolate has fully set, your Butterfinger balls are good to go! Store any extras in a sealed container in the refrigerator.
Notes
Helpful Tips
To ensure your Butterfinger balls turn out perfectly every time, keep these tips in mind:- Use High-Quality Butterfingers : The quality of your Butterfinger balls heavily depends on the Butterfingers you use. Opt for fresh, high-quality Butterfingers to enhance the overall flavor.
- Soften the Cream Cheese and Butter : Let the cream cheese and butter soften to room temperature before you start mixing. This ensures a smooth and consistent dough without lumps.
- Chill the Mixture Well : Chilling the butterfinger balls before dipping them in chocolate is crucial. It helps the chocolate adhere better and prevents the balls from becoming too soft.
- Customize Your Toppings : Don’t hesitate to add your own twist with unique toppings . From colorful sprinkles to a dusting of cocoa powder, the possibilities are endless and can make your Butterfinger balls uniquely yours.




Pingback: White chocolate raspberry cheesecake balls - sugaryrecipes