Table des matières
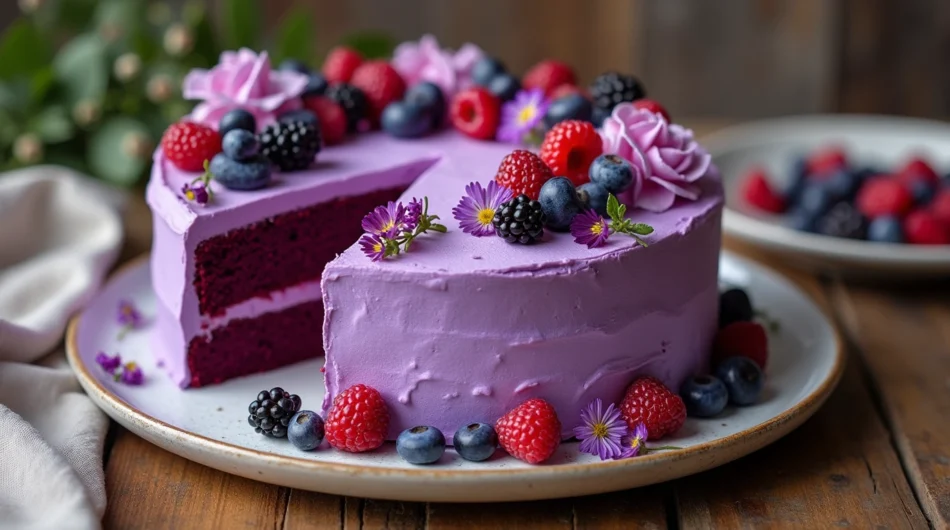
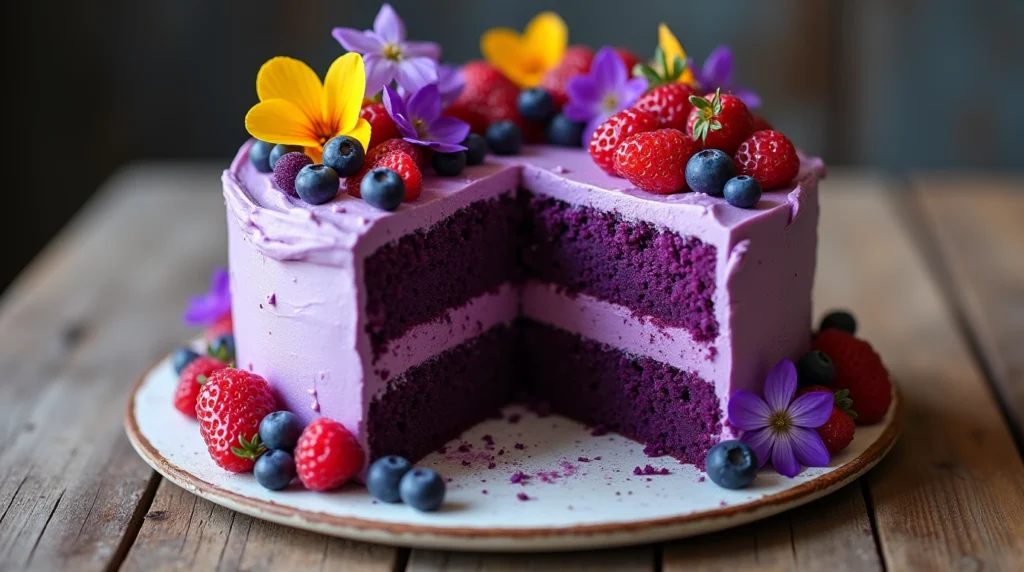
Looking for a dessert that’s not only delicious but also looks stunning? The Purple Velvet Cake Recipe is here to impress! This cake has a soft,with cream cheese frosting ,velvety texture and a vibrant purple color, perfect for special occasions like birthdays, weddings, or even just a fun weekend treat.
In this post, you’ll learn how to make a purple velvet cake step by step, along with tips, variations, and storage ideas to make it easy for everyone. Whether you’re an experienced baker or a beginner, this guide will help you bake a cake that’s as beautiful and tasty. Let’s dive in!
If you consider yourself a true cake lover, take some time to explore this carefully curated list of delightful options that are sure to satisfy your sweet cravings.
Irresistible Chocolate Overload Cake
Why You’ll Love This Recipe
This Purple Velvet Cake Recipe is a must-try, and here’s why:
- Visually Stunning: Its bright purple makes it stand out and creates a wow factor at any gathering.
- Incredibly Moist and Soft: Thanks to buttermilk and oil, the cake has a perfect texture that melts in your mouth.
- Easy to Make: With simple ingredients and straightforward steps, even beginners can confidently bake this cake.
- Customizable: Add your favorite frosting or decorations to make it your own. You can even add fresh fruits or sprinkles for extra flair.
Ingredients
You’ll need the following ingredients to make this amazing Purple Velvet Cake :
For the Purple cake:
- ½ cups all-purpose flour
- ¾ cups sugar
- 1 teaspoon baking soda
- 1 teaspoon salt
- 1 teaspoon cocoa powder
- 2 large egg
- ¼ cups buttermilk
- ½ cups vegetable oil
- 1 teaspoon white vinegar
- 2 teaspoons vanilla extract
- Purple gel food coloring (adjust for the shade you want)
For the Frosting:
- 8 oz (1 package) cream cheese, softened
- ½ cup unsalted butter, softened
- 4 cups powdered sugar
- 1 teaspoon vanilla extract
- 2 tablespoons heavy cream (optional for smoothness)
How To Make Purple Velvet Cake Recipe
Step 1: Prepare the Batter
Heat the oven to 350°F (175°C) to get it ready for baking. Lightly grease two 9-inch round cake pans and line them with parchment paper to prevent the cakes from sticking.
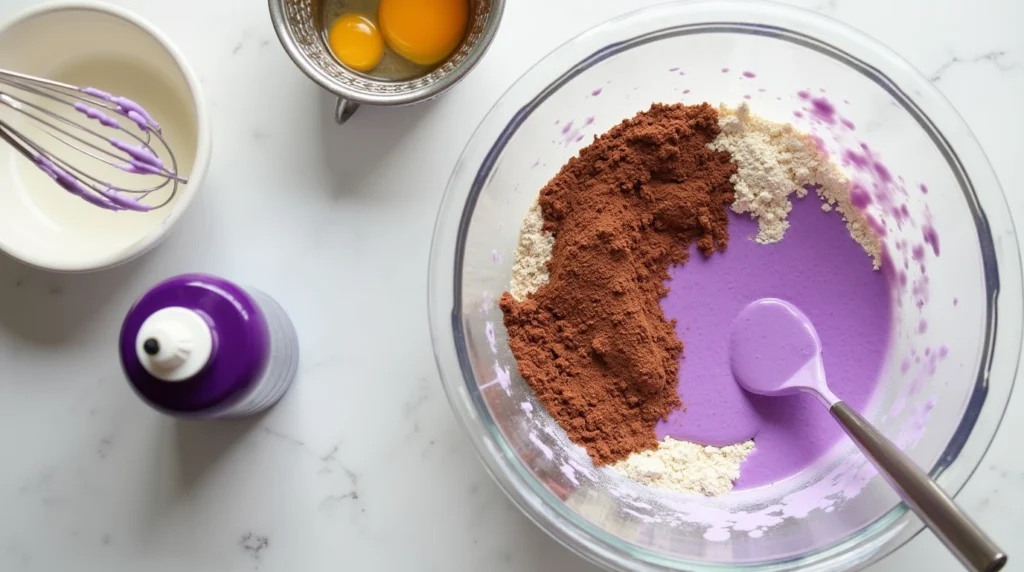
Combine Dry Ingredients: In a large mixing bowl, sift together the flour, sugar, baking soda, salt, and cocoa powder. This step helps create a smooth and evenly blended mixture.
- Combine Wet Ingredients: In a separate bowl, whisk the eggs, buttermilk, oil, vinegar, and vanilla extract until the mixture is silky and well blended.
- Bring It All Together: Gradually pour the wet ingredients into the dry ingredients, stirring gently. Gently stir until all ingredients are incorporated, being careful not to mix too much.
- Add the Purple Magic: Stir in the purple gel food coloring. Adjust the amount to achieve the desired shade, ensuring the color is evenly distributed throughout the batter.
Step 2: Bake the Purple cake
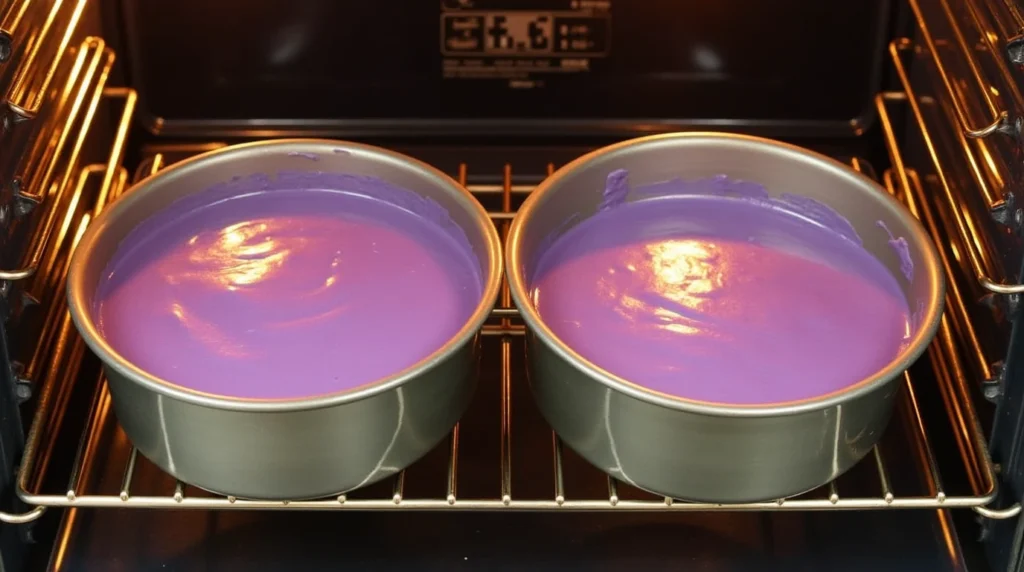
- Fill the Pans: Divide the batter evenly between the two prepared cake pans. Use a spatula to smooth the tops even when baking.
- Bake to Perfection: Place the pans in the oven and bake for 30–35 minutes. You’ll know they’re ready when a toothpick inserted in the center comes out clean.
- Cool Down: Remove the cakes from the oven and let them cool in the pans for about 10 minutes. Then, transfer the layers to a wire rack to cool completely before frosting.
Step 3: Make the cream cheese frosting
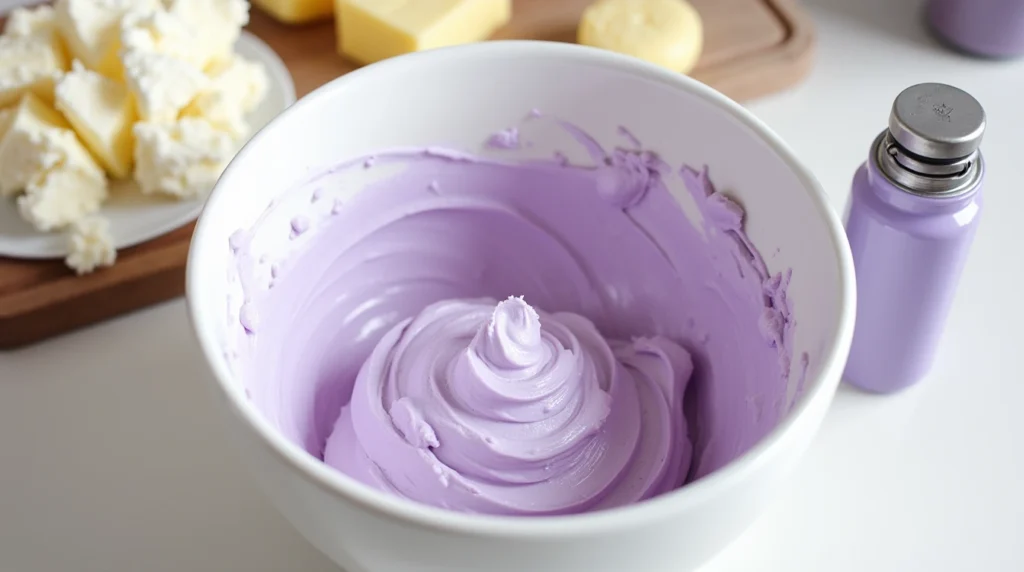
- Cream Together: In a large mixing bowl, whip the softened cream cheese and butter until the texture is light, smooth, and fluffy.
- Sweeten It: Gradually add the powdered sugar, one cup at a time, mixing well after each addition. This creates a smooth, sweet frosting.
- Add a Finishing Touch: Stir in the vanilla extract and, if you want a silkier texture, add a splash of heavy cream. Beat everything together until you reach the desired consistency.
Step 4: Assemble the purple cake
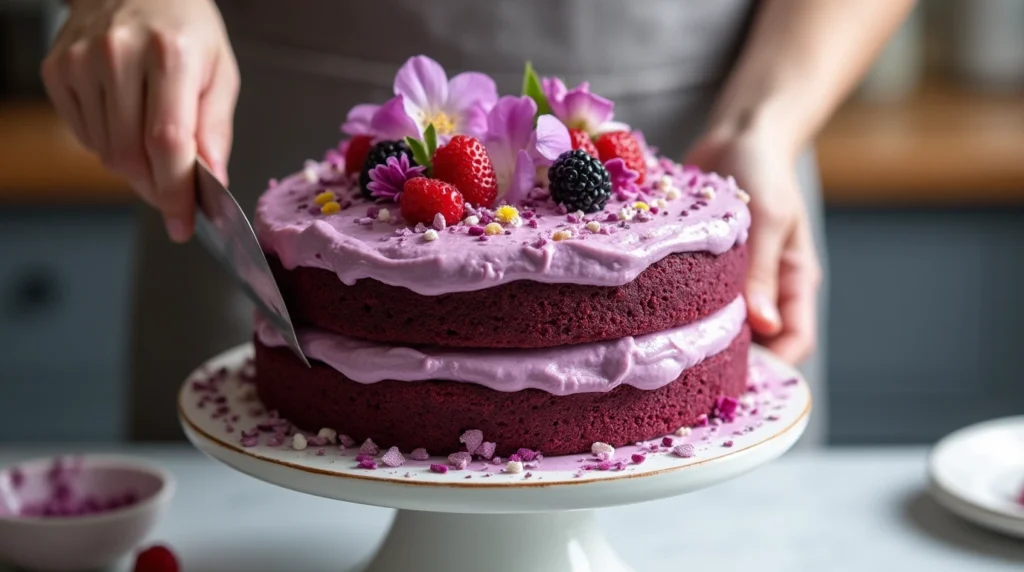
Assemble the Purple cake: Place one cooled cake layer onto a serving plate or cake stand. Spread a generous, even layer of frosting across the top.
- Layer and Finish: Gently place the second cake layer on top. Use the remaining frosting to coat the top and sides, smoothing it out with a spatula or creating a rustic texture, depending on your preference.
- Make It Special: Decorate the Purple velvet cake however you like—sprinkles, edible flowers, fresh berries, or even a drizzle of chocolate. Let your creativity shine!
Helpful Tips
- Use Gel Food Coloring: Gel gives you a bold color without making the batter too runny.
- Room Temperature Ingredients: Let eggs, buttermilk, and cream cheese come to room temperature for easier mixing and better results.
- Don’t Overmix: Mix until combined to avoid a dense cake.
- Level the Cake Layers: Trim the tops of the purple velvet cake with a knife to create even layers for assembly.
Storage and Reheating Instructions
Storing the Purple Velvet Cake
To keep your Purple Velvet Cake Recipe fresh and delicious, follow these simple storage tips:
- Store the purple cake in an airtight container and keep it refrigerated. This will keep it moist and flavorful for up to 5 days.
- Freezer: If you want to save some for later, wrap individual slices tightly in plastic wrap. Place the wrapped slices in a freezer-safe bag or container, and store them in the freezer for up to 3 months. This method makes it easy to grab a slice whenever you have a craving!
Reheating the Purple Velvet Cake Recipe
Here’s how to enjoy your Purple Velvet Cake as if it’s freshly made:
- At Room Temperature: For frozen slices, let them sit at room temperature for about 2 hours to thaw naturally. This keeps the texture soft and the frosting intact.
- Microwave: If you prefer a warm slice, place it on a microwave-safe plate and heat it for 10–15 seconds. This quick warm-up softens the cake and frosting, but be cautious not to overheat, as the frosting can melt.
By storing and reheating your Purple Velvet Cake Recipe properly, you’ll enjoy its delightful flavors and textures every time!
Variations and Substitutions
Diet-Friendly Alternatives
Making this Purple Velvet Cake Recipe suitable for different dietary needs is easier than you think:
- Gluten-Free Option: Swap out regular flour for a good-quality gluten-free flour blend. Look for one designed for baking to ensure the cake stays moist and fluffy.
- Dairy-Free Adaptation: Replace the buttermilk with almond milk (or any plant-based milk) mixed with 1 tablespoon of vinegar. This creates a similar tangy effect, keeping the cake’s flavor balanced without using dairy.
Flavor Enhancements
Want to add a unique twist? Try these simple upgrades:
- Nutty Note: Stir in a splash of almond extract to give the cake a warm, nutty undertone that pairs beautifully with most frostings.
- Citrus Kick: Grate in some fresh lemon zest for a bright, citrusy flavor that feels fresh and vibrant in every bite.
Creative Frosting Ideas
Take your frosting game to the next level with these delicious options:
- White Chocolate Ganache: For a rich and luxurious finish, swap the traditional cream cheese frosting for a smooth white chocolate ganache. It adds a creamy sweetness that’s hard to resist.
- Light and Airy Whipped Cream: If you want something less decadent, top the cake with freshly whipped cream. It’s light and fluffy and lets the cake shine through without overpowering it.
These variations and substitutions let you customize the Purple Velvet Cake Recipe to your taste and dietary preferences while keeping it as delicious!
Frequently Asked Questions (FAQs)
What can I use if I don’t have buttermilk?
Mix 1 cup of milk with 1 tablespoon vinegar or lemon juice. Let it sit for 5 minutes, and you’ll have a perfect buttermilk substitute.
Can I make this Purple Velvet Cake Recipe vegan or gluten-free?
Yes! Use gluten-free flour or replace eggs and dairy with plant-based alternatives like flax eggs and almond milk.
What type of pan works best?
Two 9-inch round pans are ideal for even layers, but you can adapt the recipe for cupcakes, loaf pans, or a bundt pan with adjusted baking times.
Can I use natural Food coloring for purple velvet cake?
Yes, natural food coloring like powdered purple yam, beet powder, or butterfly pea flower extract can work. Remember that the color may not be as vibrant as gel food coloring.
Can I make this Purple Velvet Cake Recipe in advance?
Yes! Bake the layers a day or two ahead and store them wrapped at room temperature or in the fridge. Frost the cake closer to serving for the freshest taste.
What causes the vibrant purple color in this cake?
The combination of gel food coloring and a touch of cocoa powder creates the signature purple velvet hue. If you’re using natural food coloring, ingredients like purple yam or butterfly pea flowers can also add a stunning shade.
Can I double the Purple Velvet Cake for a larger cake?
Certainly! Double the ingredients and divide the batter among additional pans. Be mindful of your oven space and adjust the baking time as needed.
Is this purple cake suitable for special occasions?
Definitely! With its striking color and delicious flavor, Purple Velvet Cake is perfect for birthdays, weddings, and even themed parties. Dress it with edible flowers, sprinkles, or custom decorations for added flair.
Heavenly Purple Velvet Cake Recipe: A Show-Stopping Dessert You’ll Love
Equipment
- Mixing bowls
- Whisk
- Sifter
- Spatula
- Electric Mixer
- Measuring Cups and Spoons
- 9-Inch Round Cake Pans (2)
- Parchment Paper
- Wire Rack
- Cake Stand or Plate
Ingrédients
- ½ cups all-purpose flour
- ¾ cups sugar
- 1 teaspoon baking soda
- 1 teaspoon salt
- 1 teaspoon cocoa powder
- 2 large egg
- ¼ cups buttermilk
- ½ cups vegetable oil
- 1 teaspoon white vinegar
- 2 teaspoons vanilla extract
- Purple gel food coloring (adjust for the shade you want)
- 8 oz (1 package) cream cheese, softened
- ½ cup unsalted butter, softened
- 4 cups powdered sugar
- 1 teaspoon vanilla extract
- 2 tablespoons heavy cream (optional for smoothness)
Instructions
- Step 1: Prepare the BatterPrepare the Oven: Preheat your oven to 350°F (175°C). Lightly grease two 9-inch round cake pans and line them with parchment paper to prevent the cakes from sticking.Combine Dry Ingredients: In a large mixing bowl, sift together the flour, sugar, baking soda, salt, and cocoa powder. This step helps create a smooth and evenly blended mixture.
- Step 2: Bake the CakeFill the Pans: Divide the batter evenly between the two prepared cake pans. Use a spatula to smooth the tops even when bakingBake to Perfection: Place the pans in the oven and bake for 30–35 minutes. You’ll know they’re ready when a toothpick inserted in the center comes out clean.Cool Down: Remove the cakes from the oven and let them cool in the pans for about 10 minutes. Then, transfer the layers to a wire rack to cool completely before frosting.
- Step 3: Make the Frosting Cream TogetherIn a large mixing bowl, whip the softened cream cheese and butter until the texture is light, smooth, and fluffy.Sweeten It: Gradually add the powdered sugar, one cup at a time, mixing well after each addition. This creates a smooth, sweet frosting.Add a Finishing Touch: Stir in the vanilla extract and, if you want a silkier texture, add a splash of heavy cream. Beat everything together until you reach the desired consistency.
- Step 4: Assemble the CakeAssemble the Cake: Place one cooled cake layer onto a serving plate or cake stand. Spread a generous, even layer of frosting across the top.Layer and Finish: Gently place the second cake layer on top. Use the remaining frosting to coat the top and sides, smoothing it out with a spatula or creating a rustic texture, depending on your preference.Make It Special: Decorate the cake however you like—sprinkles, edible flowers, fresh berries, or even a drizzle of chocolate. Let your creativity shine!
Notes
Helpful Tips
- Use Gel Food Coloring: Gel gives you a bold color without making the batter too runny.
- Room Temperature Ingredients: Let eggs, buttermilk, and cream cheese come to room temperature for easier mixing and better results.
- Don’t Overmix: Mix until combined to avoid a dense cake.
- Level the Cake Layers: Trim the tops of the cakes with a knife to create even layers for assembly.

