Table des matières
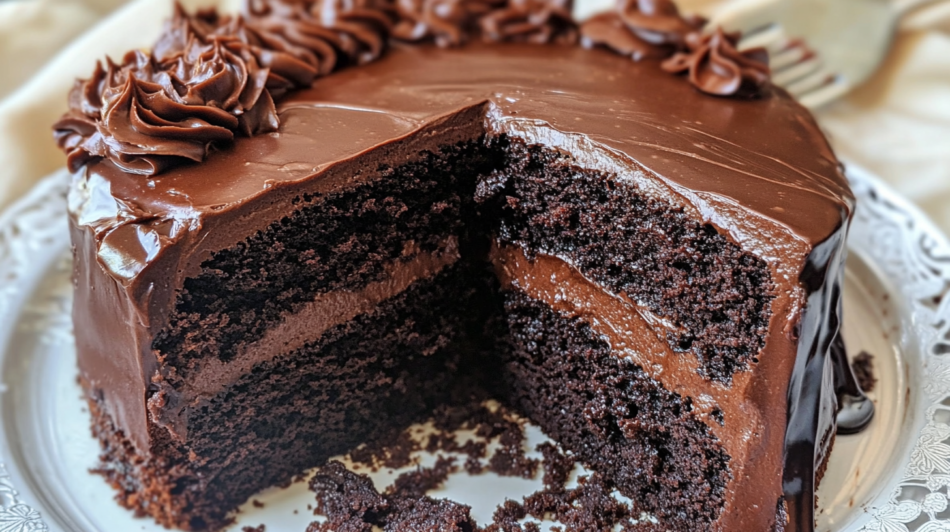
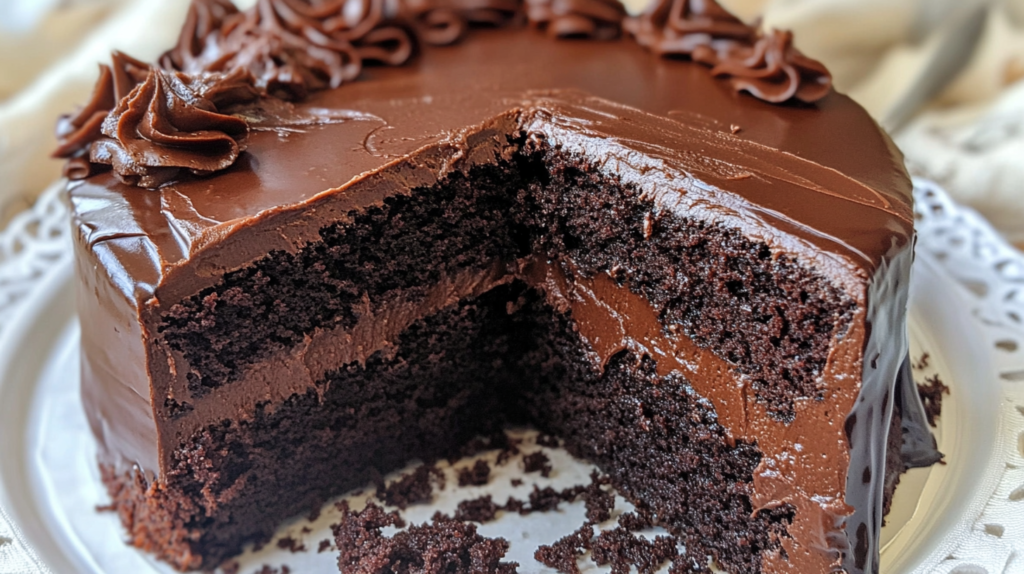
Have you ever craved a rich, moist, and indulgent chocolate cake that it feels like a hug for your taste buds? If so, you’re in for a treat! Today, we’re diving into the world of brick street chocolate cake, a dessert that has won the hearts of food lovers worldwide. Whether you’re a seasoned baker or a beginner, this recipe is designed to be simple, foolproof, and utterly delicious.
This blog post will guide you through every step, from gathering the ingredients to slicing into the perfect cake. Along the way, we’ll share tips, variations, and answers to common questions to ensure your baking experience is as smooth as the frosting on this cake. So, grab your apron, and let’s bake a brick street chocolate cake that will leave everyone asking for seconds!
To discover more chocolate delights, be sure to check out my recipes for: Chocolate Poke Cake , Swiss Chocolate Chalet Cake.
Why You’ll Love This brick Street Chocolate cake
- Rich, Decadent Flavor: This cake is a chocolate lover’s dream, with a deep cocoa flavor and a moist crumb.
- Easy to Make: No fancy techniques or hard-to-find ingredients—just simple steps for a stunning result.
- Perfect for Any Occasion: Whether it’s a birthday, holiday, or Tuesday, this cake fits every celebration.
- Globally Loved: Inspired by the famous brick street chocolate cake, this recipe brings a touch of bakery magic to your kitchen.
How To Make Brick street chocolate cake
- Preheat and Prep: Preheat your oven to 350°F (175°C) and grease two 9-inch cake pans. A little flour dusting won’t hurt either!
- Mix the Dry Stuff: In a big bowl, whisk together the flour, sugar, cocoa powder, baking powder, baking soda, and salt.
- Combine the Wet Ingredients: In another bowl, mix the buttermilk, oil, eggs, and vanilla. Slowly add this to the dry ingredients and stir until everything’s smooth.
- Add the Hot Water: Here’s the secret to that moist texture—pour in the hot water and mix until the batter is thin but well combined. Don’t worry; it’s supposed to look runny!

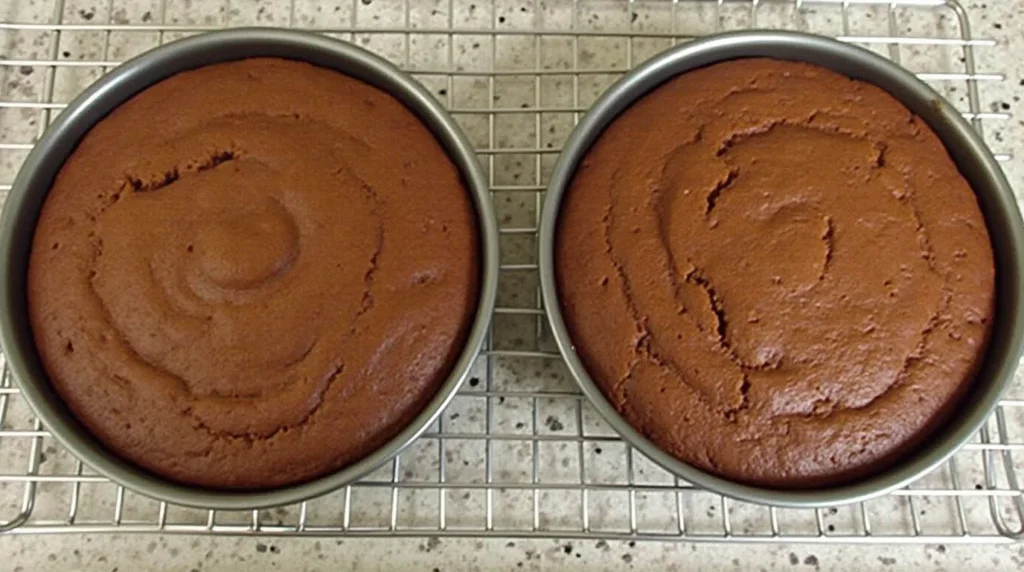
- Bake It Up: Divide the batter evenly between the pans and bake for 30-35 minutes. You’ll know it’s done when a toothpick comes out clean.
- Cool It Down: Let the cakes cool in the pans for 10 minutes, then transfer them to a wire rack to cool completely. Patience is key here—don’t frost a warm cake!
- Make the Frosting: While the cakes cool, beat the butter until it’s creamy, then gradually add the powdered sugar, cocoa powder, heavy cream, and vanilla. Whip it until it’s fluffy and dreamy.
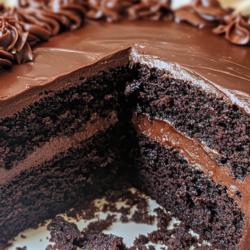
- Assemble Your Masterpiece: Frost the cooled cakes, stacking them evenly. Add some chocolate shavings or fresh berries for that extra wow factor.
Helpful Tips
Room Temperature Ingredients: This makes a huge difference! Cold eggs or butter can mess with the texture.
Don’t Overmix: Once the ingredients are combined, stop mixing. Overmixing can make the cake dense.
Cool Before Frosting: Trust me, frosting a warm cake is a messy disaster waiting to happen.
Get Creative with Toppings: Add nuts, caramel drizzle, or even a sprinkle of sea salt for a fun twist.
frequently Asked Questions
1. Can I make this brick street chocolate cake ahead of time?
Absolutely! You can bake the cake layers a day in advance and store them at room temperature, tightly wrapped in plastic wrap. The next day, prepare the frosting and assemble the cake before serving. It’s a perfect time-saving trick for parties or special occasions.
2. What if I don’t have buttermilk?
No worries! Mix 1 cup of milk with 1 tablespoon of lemon juice or white vinegar, then let it sit for 5 minutes. The mixture will slightly thicken and become acidic, giving you the same effect as buttermilk in your recipe.
3. How do I prevent my cake from sticking to the pan?
This is a question everyone asks! The key is to generously grease your pans and add a light dusting of flour to create a non-stick barrier. For extra insurance, cut a circle of parchment paper to fit the bottom of the pan and place it before pouring in the batter. You’ll see—your cake will come out like a charm!
4. Can I use dark cocoa powder?
Yes, and it’s actually a great idea if you love intense chocolate flavor! Dark cocoa powder will give your cake a deeper, richer taste. Use the same amount as in the recipe, but keep in mind that the cake will have a darker color and a slightly more bitter taste, which is perfect for dark chocolate lovers.
5. Can I freeze this brick street chocolate cake?
Of course! If you have leftovers (which is rare with this cake!), you can freeze individual slices. Wrap each slice in plastic wrap, then in aluminum foil. They’ll keep for up to 3 months in the freezer. To thaw, simply let them come to room temperature or warm them up slightly in the microwave.
6. Can I make this brick street chocolate cake without eggs?
Yes, it’s possible! Replace each egg with 1/4 cup of unsweetened applesauce or plain yogurt. The texture will be slightly different, but the cake will still be moist and delicious.
7. How do I know if my cake is fully baked?
The toothpick test never fails! Insert a toothpick or the tip of a knife into the center of the cake. If it comes out clean, with no batter sticking to it, it’s done. If you see crumbs or wet batter, let it bake for a few more minutes.
8. Can I add extra toppings?
Absolutely! This cake is a blank canvas for your creativity. Add chopped nuts, chocolate chips, or even a layer of caramel between the layers. You can also decorate the top with fresh fruit, chocolate shavings, or a light dusting of powdered sugar.
Brick street chocolate cake
Ingrédients
- 2 cups all-purpose flour
- 2 cups granulated sugar
- 3/4 cup unsweetened cocoa powder (the good stuff!)
- 2 tsp baking powder
- 1.5 tsp baking soda
- 1/2 cup vegetable oil
- 2 large eggs
- 2 tsp vanilla extract
- 1 cup hot water
- 1 cup buttermilk
- 1 cup unsalted butter, softened
- 4 cups powdered sugar
- 1/2 cup unsweetened cocoa powder
- 2 tsp vanilla extract
- 3 tsp Heavy cream
Instructions
- Preheat and Prep: Preheat your oven to 350°F (175°C) and grease two 9-inch cake pans. A little flour dusting won’t hurt either!
- Mix the Dry Stuff: In a big bowl, whisk together the flour, sugar, cocoa powder, baking powder, baking soda, and salt. Pro tip: sift the cocoa powder if it’s lumpy.
- Combine the Wet Ingredients: In another bowl, mix the buttermilk, oil, eggs, and vanilla. Slowly add this to the dry ingredients and stir until everything’s smooth.
- Add the Hot Water: Here’s the secret to that moist texture—pour in the hot water and mix until the batter is thin but well combined. Don’t worry; it’s supposed to look runny!
- Bake It Up: Divide the batter evenly between the pans and bake for 30-35 minutes. You’ll know it’s done when a toothpick comes out clean.
- Cool It Down: Let the cakes cool in the pans for 10 minutes, then transfer them to a wire rack to cool completely. Patience is key here—don’t frost a warm cake!
- Make the Frosting: While the cakes cool, beat the butter until it’s creamy, then gradually add the powdered sugar, cocoa powder, heavy cream, and vanilla. Whip it until it’s fluffy and dreamy
- Assemble Your Masterpiece: Frost the cooled cakes, stacking them evenly. Add some chocolate shavings or fresh berries for that extra wow factor.