Table des matières
Over the years, I’ve tried countless chocolate cake recipes, but this one truly stands out (pardon the pun). While some people enjoy cakes that are “light and airy,” I’m not really in that camp. Don’t get me wrong, those cakes have their charm, but I personally prefer something with substance—a dense, satisfying cake you can really sink your teeth into. That’s exactly what this chocolate overload cake delivers, with its bold, rich chocolate taste.
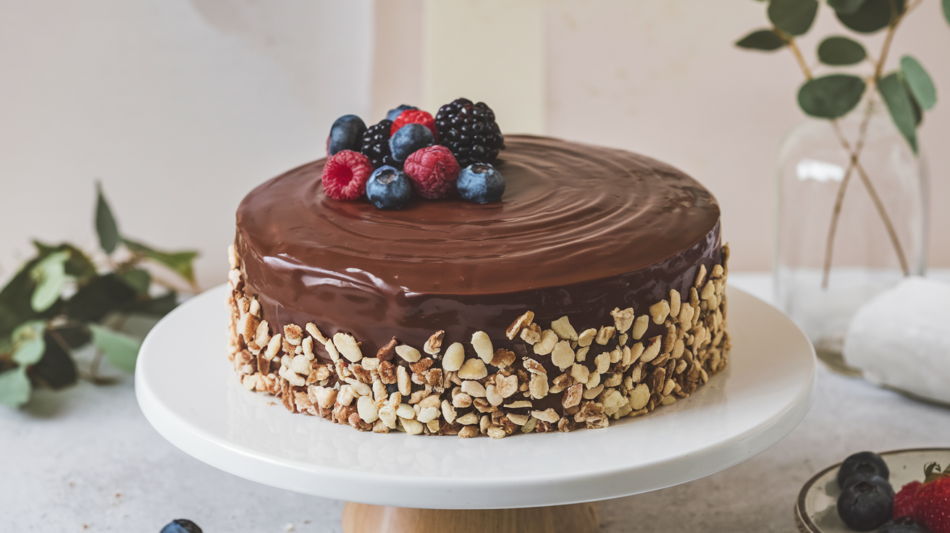
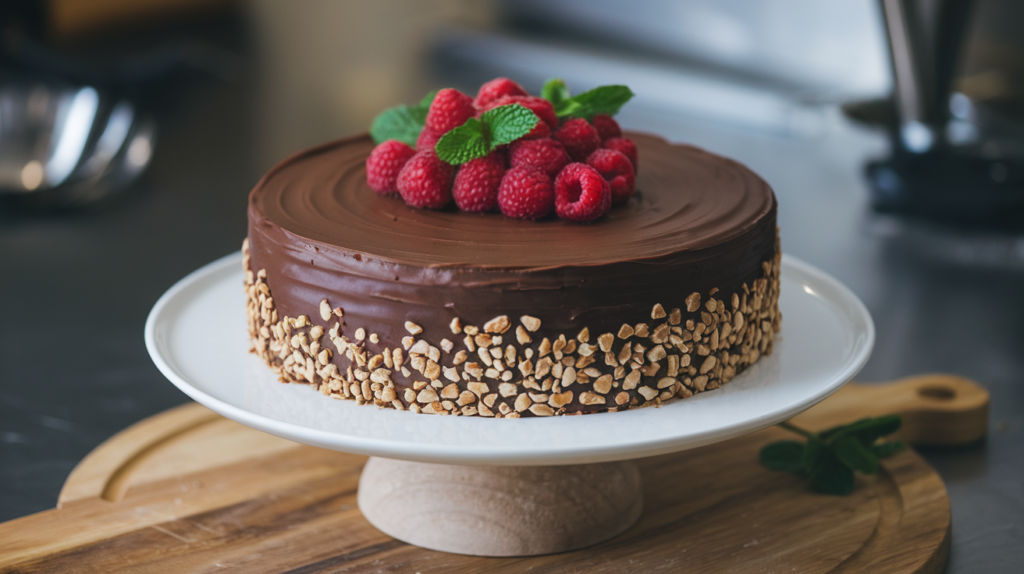
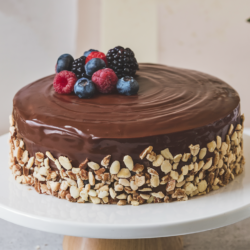
The only thing that can top a regular chocolate cake is a chocolate overload cake! This decadent and flavorful dessert might just be the ultimate chocolate cake you’ll ever bake.
Satisfy your chocolate cravings with our Chocolate Overload Cake, a delicious dessert that’s perfect for any chocolate lover. Easy to make for beginners and pros alike, this recipe packs rich chocolate flavor in every bite. Ideal for holidays, birthdays, or any special occasion, this cake is sure to send shivers down your spine with its decadent, triple-chocolate indulgence!
To discover more chocolate delights, be sure to check out my recipes for: Chocolate Poke Cake , Swiss Chocolate Chalet Cake.
Why You’ll Love This Recipe
Our Chocolate Overload Cake stands out for several reasons that make it a must-try for every chocolate enthusiast:
1: Rich Chocolate Flavor
This Chocolate Overload Cake is packed with high-quality cocoa, ensuring a deep and satisfying chocolate taste. We use premium unsweetened cocoa powder that delivers an intense chocolate flavor, making every bite a decadent experience. The addition of espresso powder (optional) enhances the chocolate notes, creating a more complex and robust taste that true chocolate lovers will appreciate.
2: Moist and Fluffy Texture
One of the standout features of our Chocolate Overload Cake is its incredibly moist and fluffy texture. Achieving the perfect balance of ingredients is critical to this delightful consistency. The combination of oil and boiling water keeps the cake tender and prevents it from drying out, while the precise measurements of flour and leavening agents ensure a light and airy crumb. Each slice melts in your mouth, offering a luxurious and smooth bite that feels both rich and delicate. Whether you’re enjoying it on its own or paired with a scoop of ice cream, the cake’s moistness enhances the overall eating experience, making it irresistibly soft and enjoyable.
3: Versatile and Customizable
Whether you prefer dark, milk, or white chocolate, this Chocolate Overload Cake can be easily adapted to suit your taste. You can experiment with different types of chocolate in the ganache or even mix them to create unique flavor combinations. For those who love a bit of variety, adding ingredients like nuts, berries, or caramel can take your cake to the next level. This versatility makes the recipe perfect for customizing according to your preferences or the occasion, allowing you to create a personalized dessert that everyone will love.
By focusing on these key aspects, our Chocolate Overload Cake promises a delightful baking and eating experience. Its rich flavor, perfect texture, adaptability, and ease of preparation make it a standout recipe that you’ll want to make time and time again. Whether you’re baking for a special occasion or just to satisfy a sweet craving, this cake is sure to impress and bring joy to any dessert table.
Ingredients
To create this sumptuous Chocolate Overload Cake, you’ll need the following:
For the Cake:
- 2 cups all-purpose flour
- 2 cups granulated sugar
- 3/4 cup unsweetened cocoa powder
- 2 teaspoons baking powder
- 1.5 teaspoons baking soda
- 1 teaspoon salt
- One teaspoon espresso powder (optional, enhances chocolate flavor)
- 1 cup milk
- 1/2 cup vegetable oil
- 2 large eggs
- 2 teaspoons vanilla extract
- 1 cup boiling water
For the Chocolate Ganache:
- 1 cup heavy cream
- 8 ounces semi-sweet chocolate, chopped
- 2 tablespoons unsalted butter
For Decoration:
- Chocolate shavings or curls
- Fresh berries (optional)
How To Make This Recipe
Follow these simple steps to craft your very own Chocolate Overload Cake:
Step 1: Preheat your oven to 350°F and then grease two round cake pans with 9 inches and put parchment paper on the bottom of each.
Step 2 : Combine the Dry Ingredients
In a large mixing bowl, sift all the dry ingredients together: flour, sugar, cocoa powder, baking powder, baking soda, salt, and espresso powder if it is being used. Whisking is essential in ensuring that it has a smooth texture and there are no lumps when it comes to the batter.
Step 3: Combine Wet Ingredients
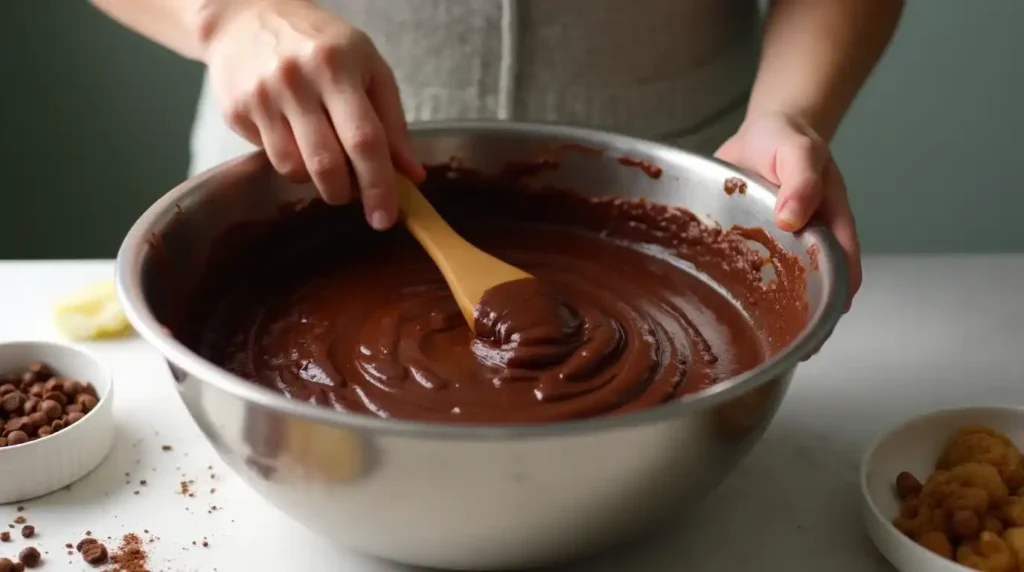
Incorporate the milk, vegetable oil, eggs, and vanilla extract into the flour mixture. With an electric mixer, blend at medium beat until ingredients are incorporated well.
Step 4 : Incorporate
Boiling Water: It is important not to pour hot water on it when you have placed it in the bowl; whisk at low speed until the consistency of the batter is smooth. It will be fragile, as it should be, so the cake becomes moist.
Step 5: Bake the Cakes
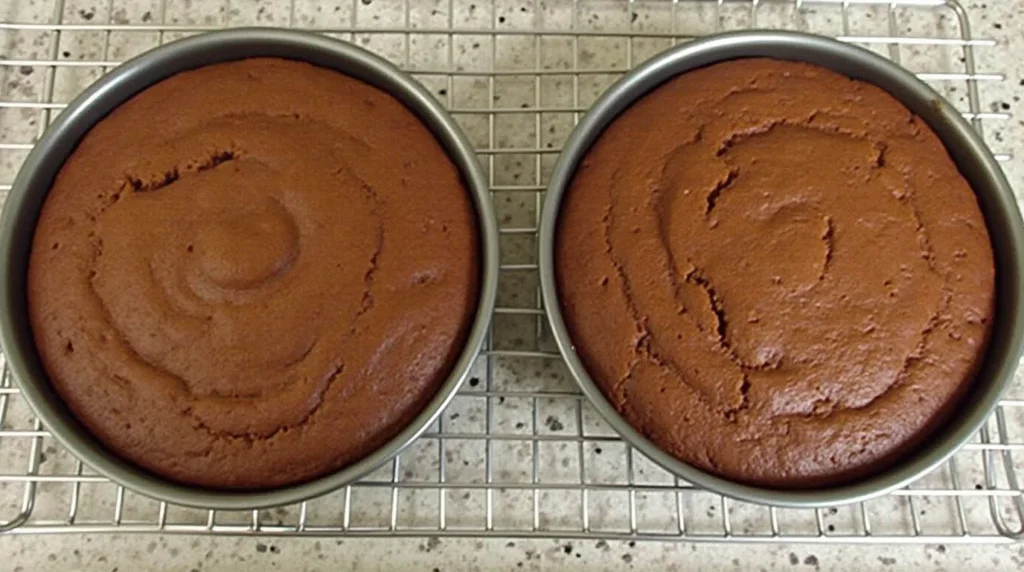
Spread the batter evenly in the two cake pan that was used for preparing the cake. Place the cake mixture in the hot oven and bake additionally for 30-35 minutes; check the readiness of the cake with a toothpick – the insertions should not be dirty.
Step 6 : Cool the Cakes
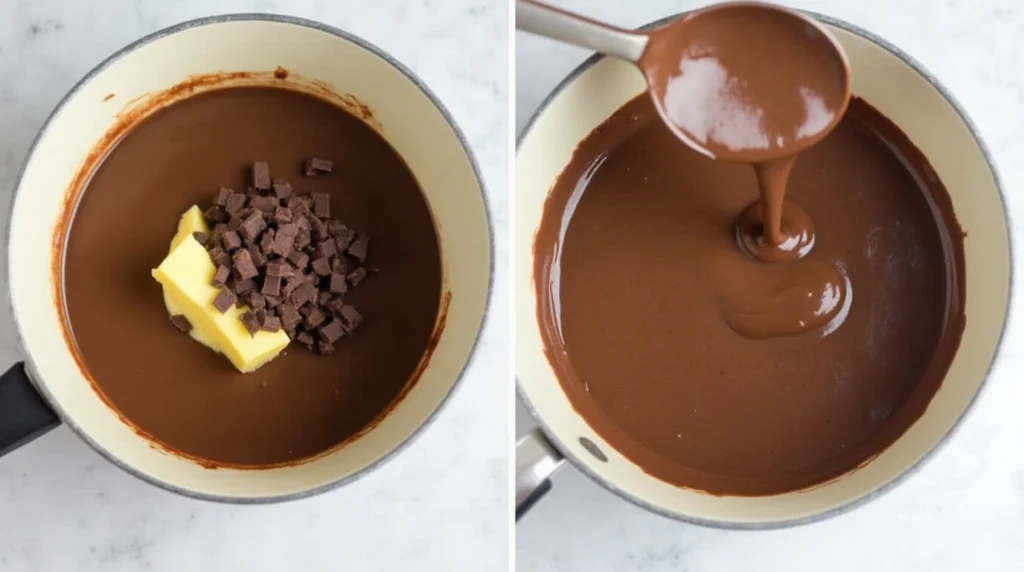
Once the cakes are baked, take them out of the oven and allow them to rest in the pan for roughly 10 minutes to cool. Then, cool them on wire racks only; remember this, please. Get ready with the Chocolate Ganache in a small saucepan, and heat the heavy cream until it’s almost boiling. Remove from heat, and mix chopped cooked semi-sweet chocolate and unsalted butter. Mix for a minute, and after that, mix until you get a smooth and shiny mass.
Step7: Assemble the Cake
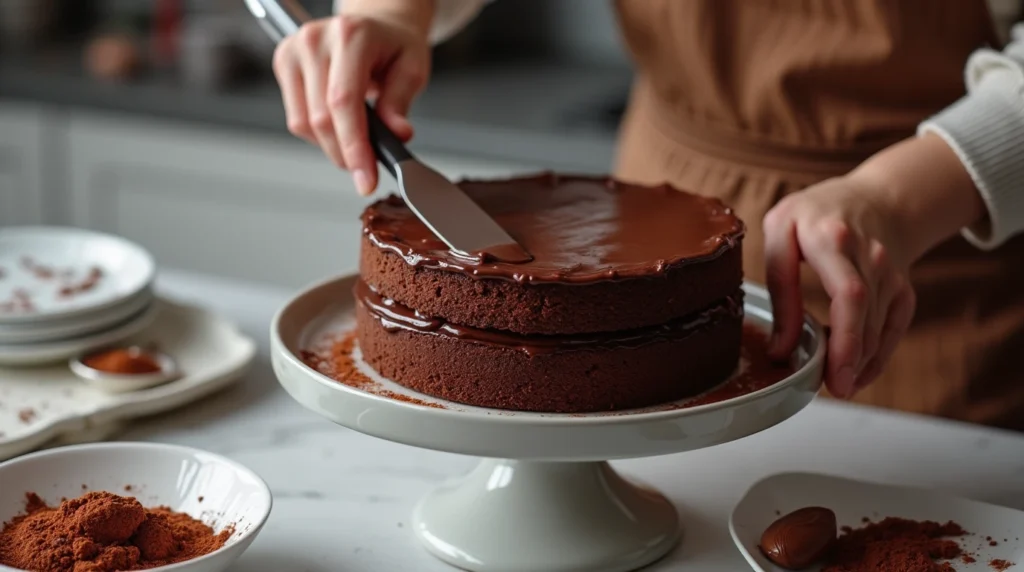
First, serve one cake layer. Pour a nice layer of the chocolate ganache on top of it. Now take the second layer of cake and place it and then pour the remaining ganache on the cake and let it spill down the sides.
Step8: Decorate
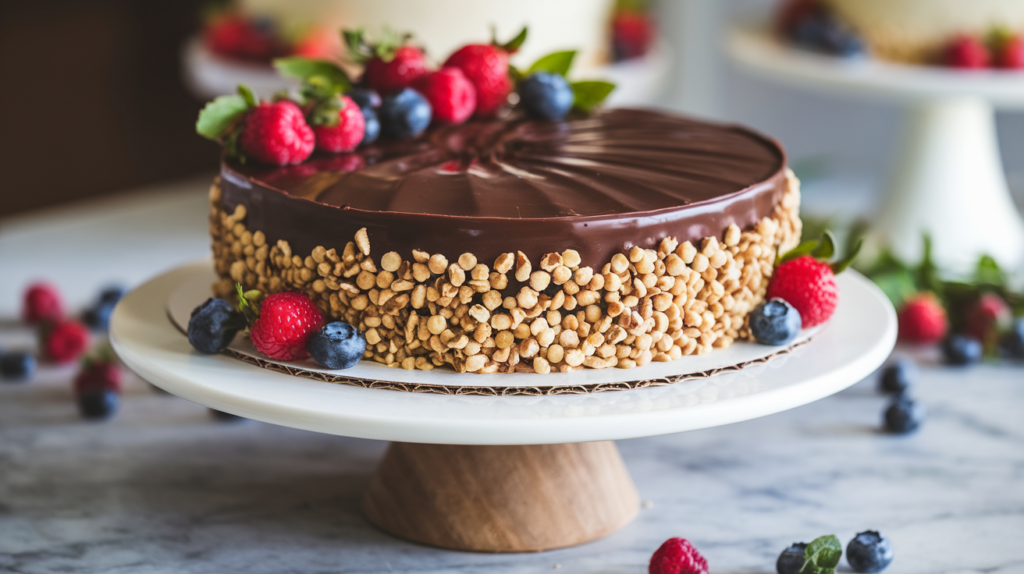
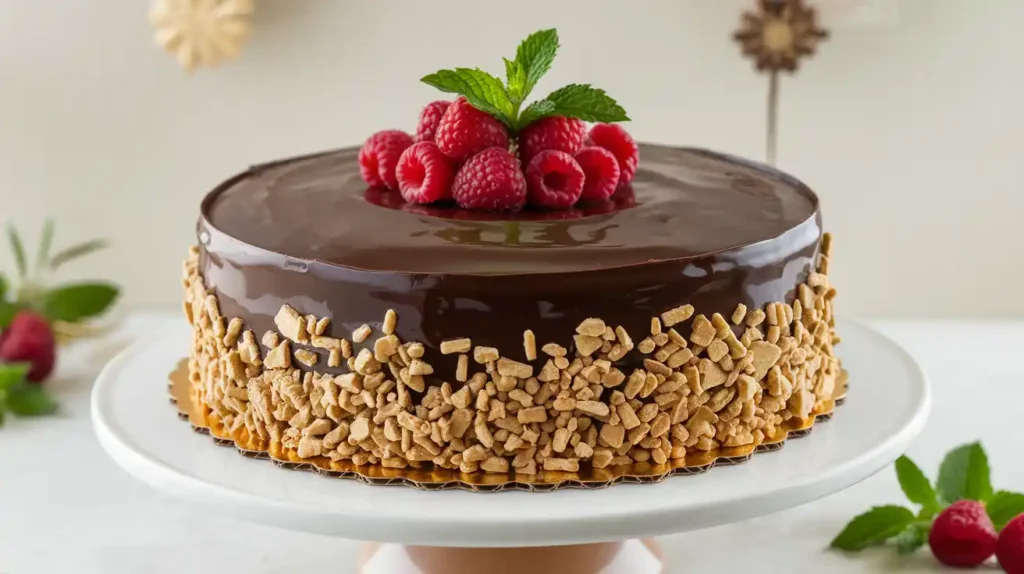
Optional drinks toppings are chocolate shavings, curls, or any fresh berries of your choice. It is perfect to let the ganache set before slicing to make the perfect slice for everyone.
Helpful Tips
To ensure your Chocolate Overload Cake turns out perfectly every time, consider these concise tips:
- Use High-Quality Cocoa Powder : Select high-quality, Natural, and No Sugar Added cocoa for optimum taste. Make sure it stays aerated and away from chemicals that may harm the freshness and smell of the ingredients.
- Measure Accurately: Always be sure to use the correct measuring cups and spoons and it might be a good idea to invest in a kitchen scale. Evaluations mean predictions of getting the right texture and taste in the product.
- Don’t Overmix Combine ingredients : only enough so that there are no formations of large gluten strands that can make the cake heavy and yucky. A little streak of flour is acceptable
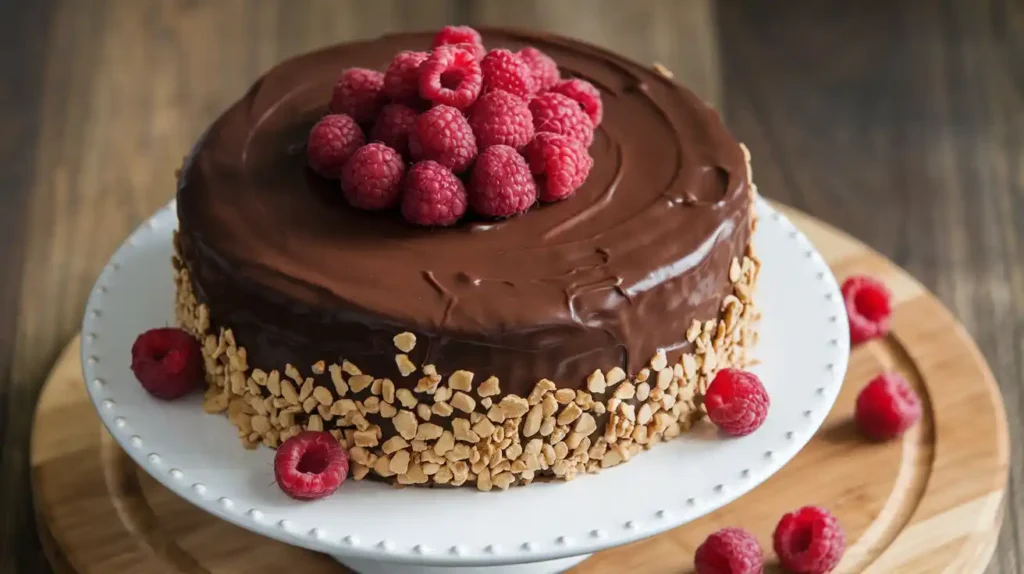
- Let the Cake Cool Completely: Remove cakes from oven and let sit in the pan for approximately 10 minutes then remove cakes from the pan and cool them on a wire rack before frosting. This helps to set the frosting properly and does not result in melting. Following the mentioned tips above you will get a delicious and perfectly textured Chocolate Overload Cake each time you try it out.
Storage and Reheating Instructions
Keeping your Chocolate Overload Cake fresh and delicious is easy with the right storage and reheating methods. Follow these simple tips to ensure every slice remains moist and flavorful.
1: Storing Your Chocolate Overload Cake
1: Room Temperature
- Cover Properly: Cover your chocolate overload cake with a cake dome, plastic wrap, or aluminum foil. This prevents it from drying out and keeps it protected from dust.
- Duration: At room temperature, your Chocolate Overload Cake stays fresh for up to 3 days, making it perfect for immediate enjoyment or short-term storage.
2: Refrigeration
- Wrap Securely: For longer storage, wrap the Chocolate Overload Cake tightly in plastic wrap or place it in an airtight container. This keeps the cake moist and prevents it from absorbing refrigerator odors.
- Duration: Refrigerated, your Chocolate Overload Cake remains fresh for up to one week, ideal for planning or enjoying over several days.
2: Freezing Your Chocolate Overload Cake
1: Preparing for Freezing
- Wrap Completely: To freeze your Chocolate Overload Cake, first tightly wrap it in plastic wrap and then aluminum foil. This double wrapping protects against freezer burn.
- Individual Slices: Alternatively, slice the Chocolate Overload Cake before freezing and wrap each slice separately.
2: Freezing Duration
- Storage Time: Your Chocolate Overload Cake can be frozen for up to 3 months without losing quality
3 : Reheating Your Chocolate Overload Cake
1: Thawing
- Overnight in Refrigerator: For best results, thaw the Chocolate Overload Cake in the refrigerator overnight. This ensures the cake remains moist and maintains its rich chocolate flavor.
- Room Temperature: If you need it sooner, let the Chocolate Overload Cake sit at room temperature for a few hours. Keep it covered to prevent drying out.
2: Microwave Method
- Quick Warm-Up: Place a slice of Chocolate Overload Cake on a microwave-safe plate and cover it with a microwave-safe lid or another plate.
- Heating Time: Microwave on medium power for 20-30 seconds. Check and heat in additional 10-second intervals if needed, ensuring the cake is warm without becoming soggy.
Variations and Substitution Ideas to Enhance Your Chocolate Overload Cake
Elevate your Chocolate Overload Cake with these creative variations and substitutions to suit different tastes and dietary preferences:
1: Add a Raspberry Filling
Enhance Flavor Contrast:
- Raspberry Jam: Spread a generous layer of high-quality raspberry jam between the cake layers. The tartness of the raspberries complements the deep chocolate flavor, adding a fruity brightness to each bite.
- Fresh Raspberries: For a more natural and vibrant taste, layer fresh raspberries between the cakes. Ensure they are well-drained to prevent excess moisture from making the cake soggy.
- Raspberry Compote: Create a raspberry compote by simmering fresh raspberries with a bit of sugar and lemon juice until it thickens. This adds a rich, syrupy layer that melds beautifully with the chocolate.
2: Use Different Types of Chocolate
Customize Flavor Profiles:
- Dark Chocolate Ganache: For a more intense and bittersweet flavor, use dark chocolate in your ganache. This pairs exceptionally well with the richness of the cake.
- Milk Chocolate Ganache: If you prefer a sweeter and creamier taste, opt for milk chocolate. It adds a smooth and luscious layer that appeals to those who enjoy a milder chocolate flavor.
- White Chocolate Ganache: Introduce a contrasting sweetness with white chocolate. Its subtle vanilla notes can balance the dark chocolate, creating a harmonious blend of flavors.
3: Incorporate Nuts
Add Texture and Flavor:
- Chopped Walnuts: Fold in chopped walnuts for a rich, buttery crunch that complements the chocolate.
- Pecans: Add pecans for their sweet and earthy flavor, enhancing the overall depth of the cake.
- Hazelnuts: Incorporate toasted hazelnuts for a nutty aroma and a delightful crunch.
4: Dairy and Egg Substitutions:
- Plant-Based Milk: Use almond milk, soy milk, oat milk, or other plant-based alternatives instead of dairy milk.
- Vegan Butter or Oil: Substitute dairy butter with vegan butter or use vegetable oil to maintain moisture and richness.
- Egg Replacers: Replace eggs with flaxseed meal (1 tablespoon flaxseed meal mixed with 3 tablespoons water per egg), applesauce, or commercial egg replacers to bind the ingredients.
5: Vegan Chocolate:
- Vegan Ganache: Choose high-quality vegan chocolate for the ganache. Many dark chocolates are naturally vegan, but always check the label to ensure no dairy is included.
- Dairy-Free Frosting: Opt for dairy-free frosting recipes using coconut cream, vegan butter, or other plant-based ingredients.
Frequently Asked Questions (FAQs)
1: Can I use a different type of milk for this recipe?
Absolutely! You can substitute regular milk with almond milk, soy milk, or any other plant-based milk to suit your dietary preferences.
2: What can I use instead of vegetable oil?
You can use melted coconut oil, canola oil, or even melted butter as a substitute for vegetable oil.
3: How do I prevent the ganache from separating?
Ensure that the heavy cream is not too hot when you add it to the chocolate. Also, using high-quality chocolate can help achieve a smooth ganache.
4: Can I make this Chocolate Overload Cake ahead of time?
Yes, the Chocolate Overload Cake can be made a day in advance. Store it properly to maintain freshness.
5: Is this Chocolate Overload Cake gluten-free?
To make a gluten-free version, substitute the all-purpose flour with a gluten-free baking blend.
Irresistible Chocolate Overload Cake
Equipment
- Mixing bowls
- Spoons
- Electric Mixer
- Spatula
- 9-Inch Round Cake Pans (2)
- Parchment Paper
- Cooling Rack
- Saucepan
- Whisk
- Offset spatula
- Toothpicks or Cake Tester
- Oven Thermometer (Optional)
Ingrédients
- 2 cups all-purpose flour
- 2 cups granulated sugar
- 3/4 cup unsweetened cocoa powder
- 2 teaspoons baking powder
- 1.5 teaspoons baking soda
- 1 teaspoon salt
- One teaspoon espresso powder (optional, enhances chocolate flavor)
- 1 cup milk
- 1/2 cup vegetable oil
- 2 large eggs
- 2 teaspoons vanilla extract
- 1 cup boiling water
- 1 cup heavy cream
- 8 ounces semi-sweet chocolate, chopped
- 2 tablespoons unsalted butter
Instructions
- Step 1: Preheat your oven to 350°F and then grease two round cake pans with 9 inches and put parchment paper on the bottom of each.
- Step 2 : Combine the Dry IngredientsIn a large mixing bowl, sift all the dry ingredients together: flour, sugar, cocoa powder, baking powder, baking soda, salt, and espresso powder if it is being used. Whisking is essential in ensuring that it has a smooth texture and there are no lumps when it comes to the batter.
- Step 3: Combine Wet IngredientsIncorporate the milk, vegetable oil, eggs, and vanilla extract into the flour mixture. With an electric mixer, blend at medium beat until ingredients are incorporated well.
- Step 4 : IncorporateBoiling Water: It is important not to pour hot water on it when you have placed it in the bowl; whisk at low speed until the consistency of the batter is smooth. It will be fragile, as it should be, so the cake becomes moist.
- Step 5: Bake the CakesSpread the batter evenly in the two cake pan that was used for preparing the cake. Place the cake mixture in the hot oven and bake additionally for 30-35 minutes; check the readiness of the cake with a toothpick – the insertions should not be dirty.
- Step 6 : Cool the CakesOnce the cakes are baked, take them out of the oven and allow them to rest in the pan for roughly 10 minutes to cool. Then, cool them on wire racks only; remember this, please. Get ready with the Chocolate Ganache in a small saucepan, and heat the heavy cream until it’s almost boiling. Remove from heat, and mix chopped cooked semi-sweet chocolate and unsalted butter. Mix for a minute, and after that, mix until you get a smooth and shiny mass.
- Step7: Assemble the CakeFirst, serve one cake layer. Pour a nice layer of the chocolate ganache on top of it. Now take the second layer of cake and place it and then pour the remaining ganache on the cake and let it spill down the sides.
- Step8: DecorateOptional drinks toppings are chocolate shavings, curls, or any fresh berries of your choice. It is perfect to let the ganache set before slicing to make the perfect slice for everyone.
Notes
Helpful Tips
To ensure your Chocolate Overload Cake turns out perfectly every time, consider these concise tips:- Use High-Quality Cocoa Powder : Select high-quality, Natural, and No Sugar Added cocoa for optimum taste. Make sure it stays aerated and away from chemicals that may harm the freshness and smell of the ingredients.
- Measure Accurately: Always be sure to use the correct measuring cups and spoons and it might be a good idea to invest in a kitchen scale. Evaluations mean predictions of getting the right texture and taste in the product.
- Don’t Overmix Combine ingredients : only enough so that there are no formations of large gluten strands that can make the cake heavy and yucky. A little streak of flour is acceptable
- Let the Cake Cool Completely: Remove cakes from oven and let sit in the pan for approximately 10 minutes then remove cakes from the pan and cool them on a wire rack before frosting. This helps to set the frosting properly and does not result in melting. Following the mentioned tips above you will get a delicious and perfectly textured Chocolate Overload Cake each time you try it out.

