
Table des matières
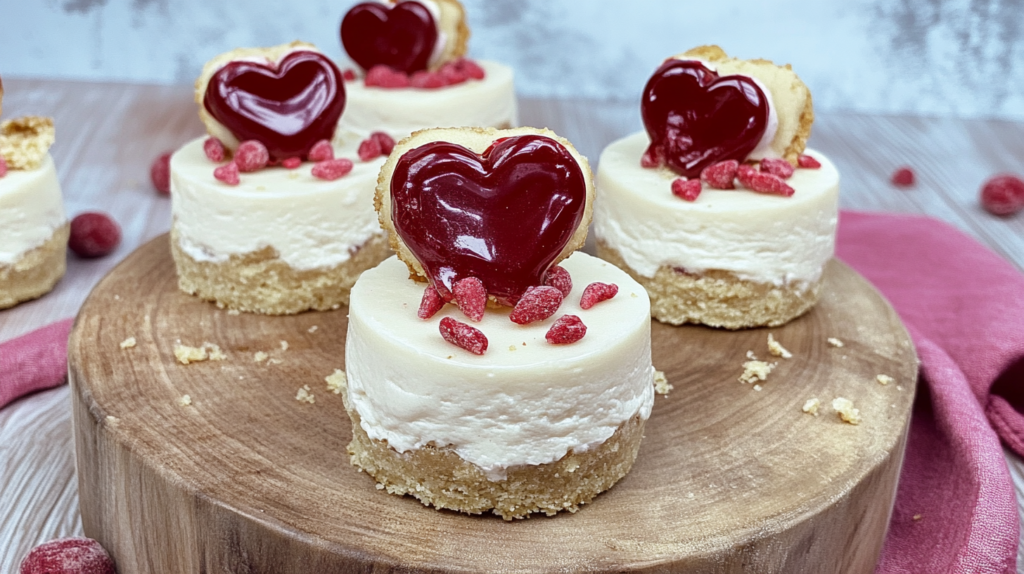
Want a sweet treat that’s easy to make and delicious? These Mini Jammie Dodger Cheesecakes are just what you need! With a crunchy biscuit base, creamy cheesecake filling, and a fruity jam topping, every bite is pure delight. Whether making them for a party or just treating yourself, this recipe is simple and guaranteed to impress. Even beginners can make these with ease!
Looking for other desserts ?Try these
Why You’ll Love This Mini Jammie Dodger Cheesecakes
- Super Easy to Make : These cheesecakes need just a few simple ingredients and are easy to prepare. No tricky steps—mix, chill, and enjoy!
- Great for Any Occasion : Perfect for family get-togethers, parties, or even as a quick treat. These Mini Jammie Dodger Cheesecakes fit any event!
- Delicious Flavors with a Fun Twist : The creamy cheesecake filling, crunchy biscuit base, and fruity jam perfectly combine flavors and textures.
- A Favorite for Kids and Adults : Jammie Dodgers bring a fun, nostalgic touch, making these Mini Jammie Dodger cheesecakes a hit with everyone!
How to Make Mini Jammie Dodger Cheesecakes
Follow these simple steps to create your Mini Jammie Dodger Cheesecakes. Don’t worry—it’s easier than it looks, and the results are worth it!
Step 1: Prepare the Base
- Crush the Jammie Dodgers: Start by crushing 200g of Jammie Dodgers into fine crumbs. You can use a food processor for quick results or place them in a ziplock bag and crush them with a rolling pin.

- Mix with Butter: Combine the biscuit crumbs with 60g of melted dairy-free butter (or regular butter) in a bowl. Mix until the crumbs resemble wet sand.
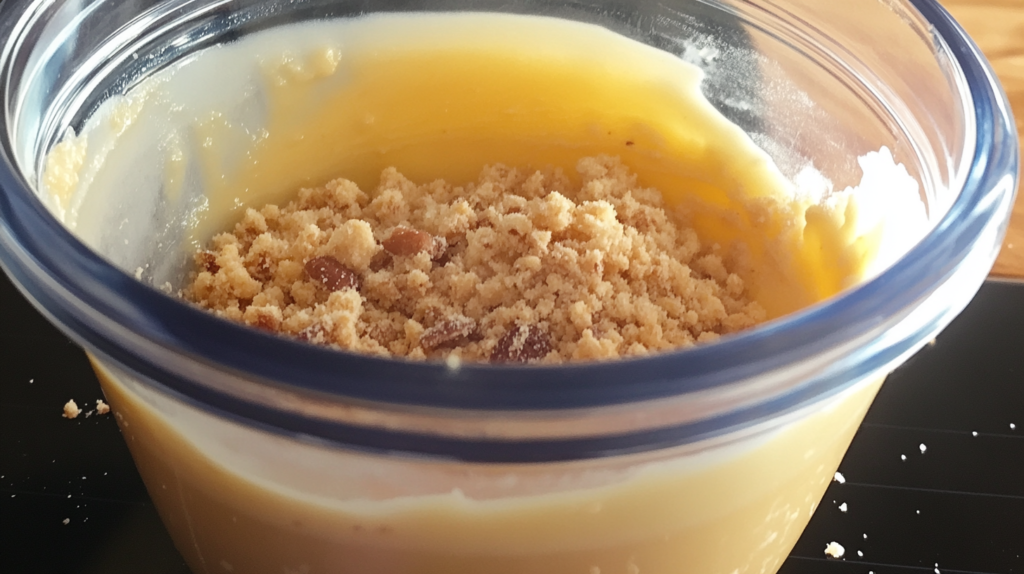
- Press into Molds: Spoon the mixture into mini cheesecake tins or muffin molds. Use the back of a spoon or a glass to press the mixture firmly into the base. This step is crucial to prevent the base from crumbling later.
Step 2: Make the Filling
- Blend the Ingredients: In a high-speed blender, combine 200g of vegan cream cheese, 100g of soaked cashews (soaked for at least 4 hours), 200ml of chilled coconut cream, 1 tsp of vanilla extract, and 2 tbsp of powdered sugar. Blend until the mixture is smooth and creamy.
- Add the Jam: Gently fold in 3 tbsp of raspberry jam. Use a spatula to create swirls for a marbled effect. Be careful not to overmix—this will help maintain those beautiful swirls.
Step 3: Assemble the Cheesecakes
- Layer the Filling: Spoon the creamy filling over the biscuit bases, smoothing the top with a spatula. Make sure the layers are even for a professional look.
- Set the Cheesecakes: Place the cheesecakes in the freezer for 15 minutes to set the layers. Then, transfer them to the fridge and let them chill overnight. This step ensures the perfect texture—firm yet creamy.


Step 4: Decorate and Serve
- Pipe the Whipped Cream: Once the cheesecakes are set, pipe pink whipped cream onto each one using a piping bag. If you don’t have a piping bag, dollop the cream with a spoon.
- Add the Finishing Touches: Top each cheesecake with a mini Jammie Dodger and a sprinkle of freeze-dried raspberries for a pop of color and crunch.
- Serve and Enjoy: Serve the cheesecakes chilled. They’re perfect for sharing—or keeping all to yourself!
Helpful Tips for Success
- Compact the Base: Press the biscuit mixture firmly into the molds to prevent it from crumbling when you slice the cheesecakes.
- Use Full-Fat Ingredients: High-fat cream cheese and coconut cream are key to achieving a rich, creamy texture. Low-fat alternatives may result in a runny filling.
- Chill Thoroughly: Freeze the cheesecakes for 15 minutes before refrigerating them overnight. This helps set the layers and makes them easier to remove from the molds.
- Customize the Jam: Feel free to experiment with different jams like strawberry, blackberry, or even lemon curd for a unique twist.
frequently Asked Questions
Do you have questions about making these Mini Jammie Dodger Cheesecakes? Don’t worry—I’ve got you covered! Here are some common questions and answers to help you nail this recipe.
Can I use regular cream cheese?
Absolutely! If you’re not following a vegan diet, regular cream cheese works just as well. Ensure it’s softened before blending to ensure a smooth and creamy filling. Leave it out at room temperature for about 30 minutes before using it.
Why is my filling runny?
A runny filling can happen for a couple of reasons:
- Overmixing: It can become runny if you blend the filling for too long or mix the jam too vigorously. Fold the jam gently to maintain the swirls.
- Low-Fat Ingredients: Low-fat cream cheese or coconut cream can affect the texture. Stick to full-fat options for the best results.
- Not Chilled Enough: If the cheesecakes haven’t been chilled long enough, the filling may not be set properly. Make sure to freeze them for 15 minutes and then refrigerate overnight.
How do I make it gluten-free?
Easy! Swap the Jammie Dodgers for gluten-free biscuits. Many brands offer gluten-free versions of jam-filled biscuits, or you can use plain gluten-free biscuits and add a layer of jam yourself. Just make sure to check the labels to ensure they’re certified gluten-free.
Can I make these Mini Jammie Dodger Cheesecakes ahead of time?
Yes, you can! These Mini Jammie Dodger Cheesecakes are perfect for making ahead. Store them in an airtight container in the fridge for 3–4 days. If you need to store them longer, wrap them individually and freeze them for up to 1 month. Thaw overnight in the fridge before serving.
Can I use a different type of jam?
Of course! Raspberry jam is classic, but feel free to get creative. Strawberry, blackberry or even apricot jam would work beautifully. For a tangy twist, try lemon curd or orange marmalade. The possibilities are endless!
What if I don’t have mini cheesecake tins?
No problem! You can use a muffin tin lined with cupcake liners or make a large cheesecake in a springform pan. Just adjust the chilling time—larger cheesecakes may need a bit longer to set.
How do I get clean slices?
For clean, picture-perfect slices, dip a sharp knife in hot water, wipe it dry, and cut the cheesecakes. Repeat this process for each slice. Chilling the cheesecakes thoroughly also helps.
Can I add chocolate to this Mini Jammie Dodger Cheesecakes ?
Definitely! Add 2–3 tbsp of cocoa powder to the filling or drizzle melted chocolate over the top for a chocolate twist. You could also use chocolate biscuits for the base.

Mini Jammie Dodger Cheesecakes: Irresistible Bite Sized Delights
Ingrédients
12 Jammie Dodgers, crushed (for the base)
8 oz cream cheese, softened
1/2 cup granulated sugar
1/2 tsp vanilla extract
1/2 cup heavy cream, whipped
1/4 cup raspberry jam
40g melted butter
Instructions
- Step 1: Prepare the BaseCrush the Jammie Dodgers: Start by crushing 200g of Jammie Dodgers into fine crumbs. You can use a food processor for quick results or place them in a ziplock bag and crush them with a rolling pin.Mix with Butter: Combine the biscuit crumbs with 60g of melted dairy-free butter (or regular butter) in a bowl. Mix until the crumbs resemble wet sand.Press into Molds: Spoon the mixture into mini cheesecake tins or muffin molds. Use the back of a spoon or a glass to press the mixture firmly into the base. This step is crucial to prevent the base from crumbling later.
- Step 2: Make the Filling Blend the Ingredients: In a high-speed blender, combine 200g of vegan cream cheese, 100g of soaked cashews (soaked for at least 4 hours), 200ml of chilled coconut cream, 1 tsp of vanilla extract, and 2 tbsp of powdered sugar. Blend until the mixture is smooth and creamy.Add the Jam: Gently fold in 3 tbsp of raspberry jam. Use a spatula to create swirls for a marbled effect. Be careful not to overmix—this will help maintain those beautiful swirls.
- Step 3: Assemble the Cheesecakes Layer the Filling: Spoon the creamy filling over the biscuit bases, smoothing the top with a spatula. Make sure the layers are even for a professional look.Set the Cheesecakes: Place the cheesecakes in the freezer for 15 minutes to set the layers. Then, transfer them to the fridge and let them chill overnight. This step ensures the perfect texture—firm yet creamy.
- Step 4: Decorate and Serve Pipe the Whipped Cream: Once the cheesecakes are set, pipe pink whipped cream onto each one using a piping bag. If you don’t have a piping bag, dollop the cream with a spoon.Add the Finishing Touches: Top each cheesecake with a mini Jammie Dodger and a sprinkle of freeze-dried raspberries for a pop of color and crunch.Serve and Enjoy: Serve the cheesecakes chilled. They’re perfect for sharing—or keeping all to yourself!